Category: Blog Posts

Anatomy of an Art Fair Display Part 1

So now for something completely different!  With the art fair season nearing and so many folks expressing their thanks for the usefulness of the Evolution of an Artist Alley Table posts, I thought it high time to post my art fair diagrams!

Mind, that this display is my very first setup and will probably change down the road as I learn, improve, and add things. Let this journal act as a record of where I began and hopefully as a tool for others looking into selling at fairs!

You might recognize some of these items and descriptions from the Artist Alley diagrams because I totally believe in re-using things where possible.

My first fair on Fayetteville’s courthouse square!

1. EZ Up Tent – This tent is a great first tent for those who don’t want to spend the $1k that most of the Craft Huts cost!  It can be set up by one person, is white (as per most art fair requirements), and fairly easy to transport in its included roller bag.  Here is a video on how to set it up with one person (because I didn’t find the included instructions very helpful).  Be warned, however, as this tent is light and is known for blowing away and wreaking havoc!  I snagged some velcro weight bags which you can fill with sand or gravel and that strap to the poles so people won’t trip over them. ($200 at Sam’s Club)

2. Retractable Vertical Banner – A pricey item, to be sure, but the fact I don’t have to carry around a big pvc pipe set nor have it taking up space in my car makes this item well worth it! This vinyl banner pulls out from and retracts back into a spring loaded base that is about as big as a tabletop easel and very lightweight. I’ve lashed it to the tent pole using velcro straps so it wouldn’t blow away. Mine was printed by my brother’s sign shop. ($300 at Graphic Signs Atlanta for stand with metal base. $100 for cheaper version at Staples)

 
3. Propanels – After much debate over whether to get carpet panels, roll up mesh panels (which are about half the price), or to jerry-rig my own from something, I decided to go all-out with Propanels. Mesh panels, while collapsible and therefore more transportable, were still about $1k after all was said and done.  I also can’t use mesh panels without the support of the tent’s rafters, whereas Propanels can stand on their own, making them useful for any cons or shows I do without a tent. The ‘knock down’ variety of panels pictured here can be split in half and transported far more easily than the full panels, even if I’m still having trouble fitting them in my teeny hatchback. ($2k from Propanels.com for the Booth A setup with Knock Down Panels plus required hardware. I owe my family favors for the rest of my life for this one. Ouch.)
 
4. Tables with Table Cloths – The two small display tables on the left of the picture are actually tail gating tables bought from Big Lots for cheap which fold up and have an easy carrying handle. They were super light, however, so I had to weight them down with objects on top. The table cloths were just scrap bits of material thrown on last minute, I admit. The larger table on the right is a white plastic table bought from Sam’s Club that folds up and can also be carried. It is a bit heavier than the tail gate tables and doesn’t really need to be weighted down. ($20 – $30 at Big Lots and Sam’s Club.)
 
5. Easel with Signage – The stand up easel was purchased at Joanns Fabrics and is just a simple cheap wooden one without any bells and whistles. The sign was printed on foam core by my publisher and was eventually replaced in this setup with a piece of framed art instead. I’m fairly sure you can get foam core signs like this at Kinkos or other printing places. ($10 at Joann’s Fabrics)
 
6. Folding Canvas Print Bin – This is the medium sized print bin available from Dickblick.  Prints ranging from 11×14 in. to 18×24 in. look best in it.  I noticed most people would stop and flip through it rather than venture into the tent. Note to self – MOAR flip through bins for people! Folks looove to browse through them for some reason. Folds up for easy transport. ($25 at Dickblick.com)


Stuff I forgot to include –  The Carpet – I like the idea of a carpet in a tent. It feels so much more cozy, as if you’re walking into a little shop!  It also made the ground a little more even for customers to walk on.  We also used it to lay items on while we were setting up so they wouldn’t get muddy.  My family picked this up in a flea market in Saudi Arabia years ago so I have no idea how much it costs.
 

This entry is going a bit long, so I’ll be breaking up this grand monologue on art fair display into parts.

Stay tuned for a closer look at the particular display items nestled within the tent next time!
 

Confessions of an Artist: Touching Down to Earth

I started this blog 3 years ago in 2009 to document what I hoped to be a successful journey into publication, an art career, and to aid my fellow artist at the same time. After so long, I’ve finally sat down to re-assess where I am, how far I’ve come, and where I’m going as it pertains to my current career goals.

It’s important to stop sometimes and be honest with ourselves about what’s working and what’s not in business, because in the end a smart businessman needs to do this or you have no business at all if it’s not making any money. It is true that passion is key, but if you’ve made your passion your business, you still have to acknowledge these sorts of things or risk wasting a lot of time, money, and willpower by ignoring problems you could solve if you could just touch down to earth every once and a great while. So here goes…touching down with one finger!


What’s Not Working (Because I prefer to end this post with the good stuff)

The Amazon Webstore – A couple of years ago, I jumped headlong into the webstore solution because I really truly believed in Amazon as an effective marketplace for artists. I took a gamble and put up a good deal of my own money to buy UPC codes and pay the store’s monthly fees. It started out great at first. The shop was paying for itself and provided a great way for me to professionally present my products.

But upgrades do not always equal improvements and the system really went downhill for me after the first year. When year two rolled around, I only sold perhaps a total of 10 or less prints in an entire year? I don’t know what happened, but for something I was shelling out $60 a month for when all the fees piled on, I lost a lot of money. I canceled it last week even though the fact I’d put SO much initial cost and effort into the setup made me hesitant to do so. I’m only just now beginning to move my entire store offerings to Etsy and Artfire .

Sometimes we gamble in business and sometimes we roll Snake Eyes. (Expect the full story of how Webstore fails in a future blog entry).

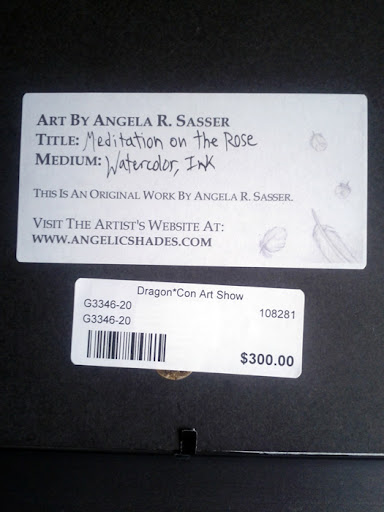
Conventions (Both Attending and Mailing In) – I attended or mailed in to at least 20 conventions in the past couple of years, but honestly?  My average profit margin after expenses was about $20 aka. a complete waste of time.  The only convention I’ve ever done consistently well at has been DragonCon. I won’t be doing cons anymore, minus the few I know have worked for me in the past.  If I do attend, it will probably be as a con-goer/art agent and not a vendor.

I am moving on instead to targeting art fairs where I can sell my crafts or book fairs where I can sell my books.  The only conventions I plan to attend from here on out are ones that line up with my career focus (ie. Illuxcon, Spectrum Fantastic Live Art, etc). I feel they will be more worth my time and help me focus on building my career rather than pandering prints at places that just aren’t working out.

Prints – Speaking of prints, they just don’t sell for me. You would think they’d be the staple of an artist’s income, but they are not (at least not me). People’s walls are full?  Perhaps I just need better art?  Or lower prices?  Perhaps Webstore sucked my print sales into the void along with Jimmy Hoffa?

Whatever the cause, other things (craft items, post cards, etc) are selling far better in recent times.  I’ll probably still have prints for sale up at my Etsy and by request, but they’re not on the top of my list of things to put in my shop anymore.

Illustration as a Career – I have tried and tried to find art reps, have sent out to all the major Fantasy/Scifi publishers who accept art submissions, have sent inquiries to licensing reps…but have met rejection or silence or automated emails each time.  This is not whining, but merely a statement of results. I know full well what I would need to do to improve to meet the demand (ArtOrder is especially helpful for educating artists in this respect), but I find I just don’t have the motivation anymore.

Frankly, I have found myself terribly bored with illustration after these couple of years. I just don’t think I have what it takes to be successful in this route because I find the current trends that are selling terribly boring. The best among us can find a way to add their own unique flair to the trends, but I just can’t seem to get myself motivated.

You have to be willing to combine the passion for the arting with the passion for what sells and I have found that even though I have a list three miles long of ideas I could try to license, I am not excited by them nor am I motivated to resubmit to the selfsame companies I submitted to before with the current work I have. I want to be challenged, I want narrative, I want engagement, and most of all I need to improve as an artist to get where I want to be.

And that is why I’m considering a change of career focus from illustration to concept art.  Funny enough, close friends who have known me for years are confused as to why I haven’t done this the first time round.  Looking back on my most successful works, they are the ones that are character-driven or involve character design in some fashion.  I’ve collected concept art books for years. I’ve always found the most fascinating part of movies and video games to be the art books and concept art development diaries. I have my reasons for having not ventured into concept art from the outset, but that’s a whole other blog entry altogether!

Money – In the end, it all boils down to the fact I am not making near enough money to support even a small apartment. The job hunting has begun and so has a push to focus on freelance means of income in the meantime (commissions, crafting, and content editing, anyone?).

What IS Working (Just when you thought the ‘not working’ section would never end)
Being Published
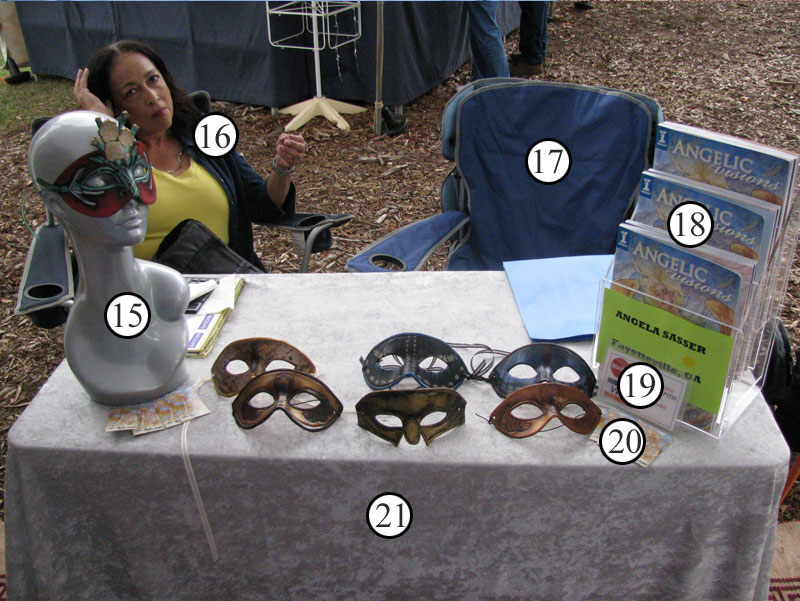
Angelic Visions has been a great source of pride for me, even though I never would have thought an art book would be the first thing I was to write (I had planned to pen my own fantasy novel in the wee hours of the night first).  My royalties from this book have been sobering, as it’s only just made back my author advance, but more sobering is the statistic that an author needs an average of at least 20 books to survive off royalty checks alone. This book is not going to make me rich and famous, but it’s an accomplishment that makes me feel I am capable of so much more if I set my mind to it!
Etsy – Thanks to Etsy’s Shop Stats dashboard, I’ve been monitoring marked improvement in sales from a meager 5 orders in 2009 to 30 so far this year. And that has been without promoting Etsy that much. Now that it’s my only shop front after Webstore’s recent demise, I expect orders to go up exponentially. I’m focusing on revamping my shop now and plan to build a wholesale orders website to match it soon, as that could be a nice consistent chunk of income, if I play my cards right. Go figure that Etsy also gets 4 times as many pageviews as my website or Webstore ever did.
Networking – The one good residual of conventions has been that I have been able to meet and connect with so many wonderful and inspiring artists! Mack and Linsner probably think I’m a stalker by now, but it’s been great to meet them and find them a familiar face in this or that event. Meeting other artists keeps me sober to the fact I’m not alone in this ‘fool’s errand’ people call art and drives me to improve and succeed. I’ve learned so much from meeting others, both about technique, running an art business, and keeping motivated.
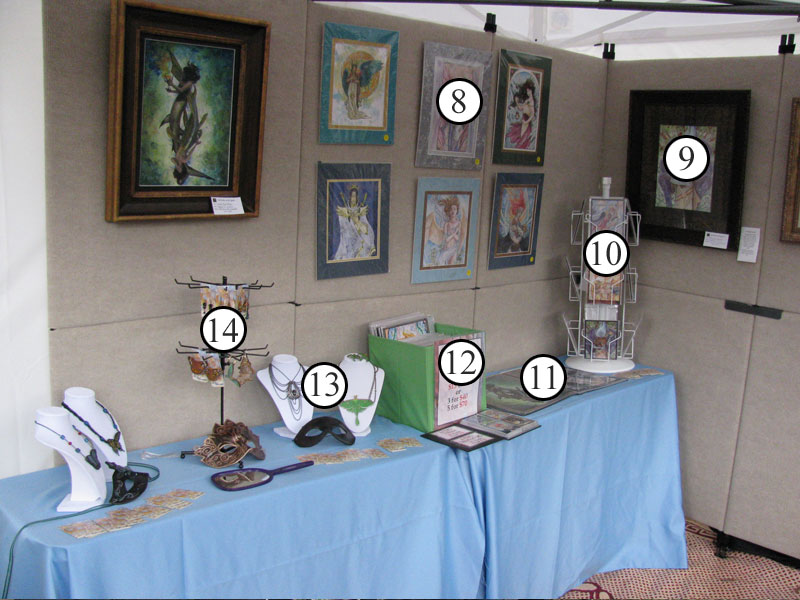
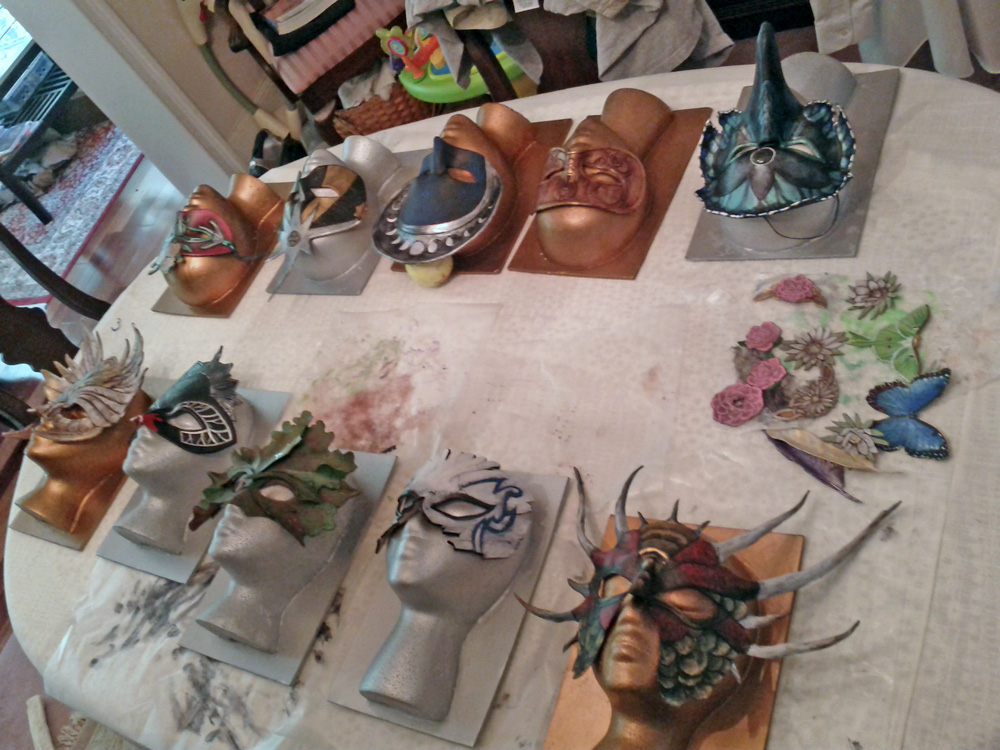
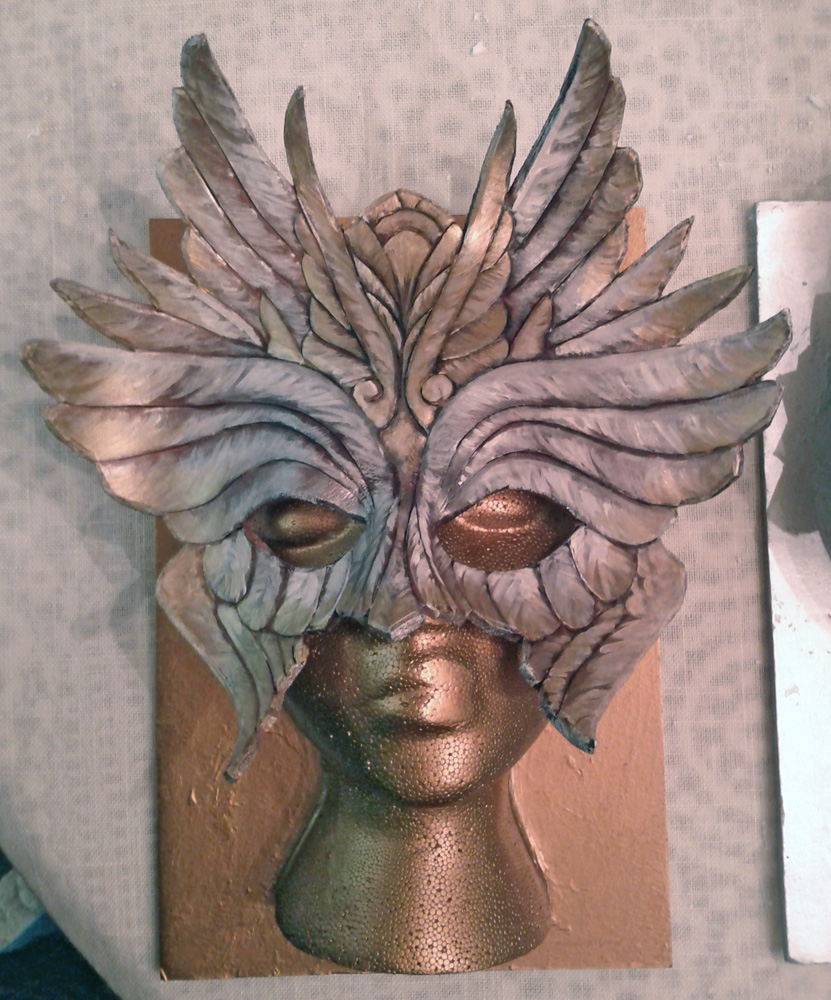
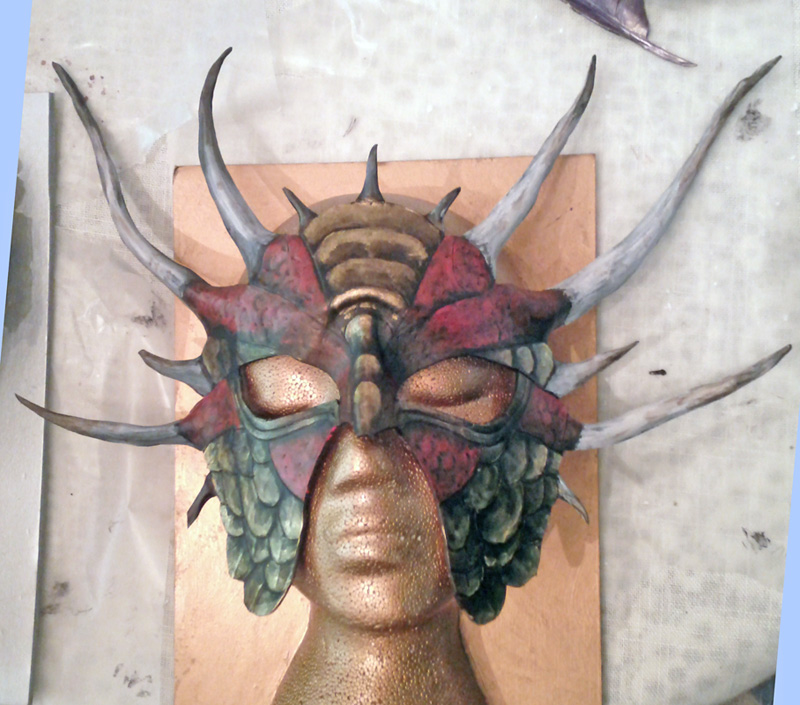
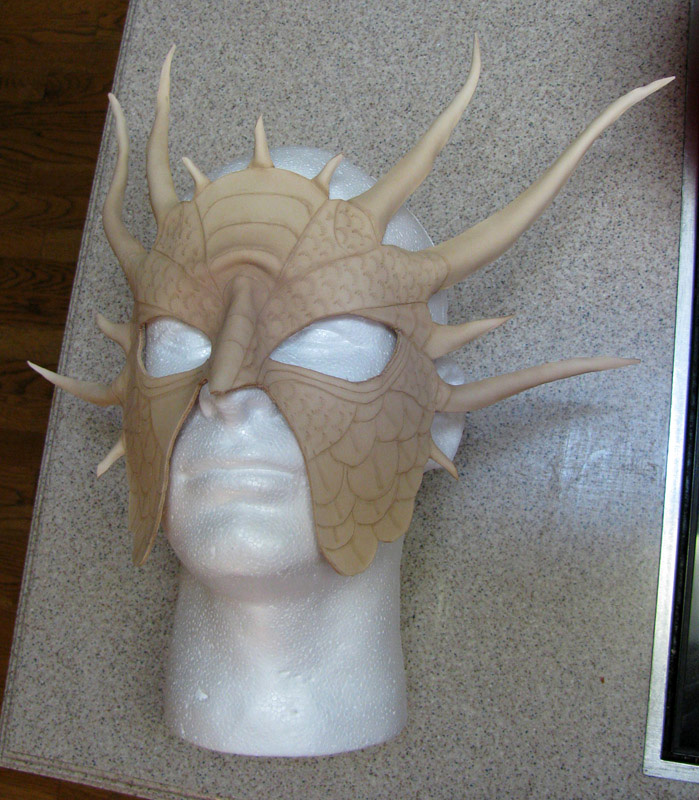
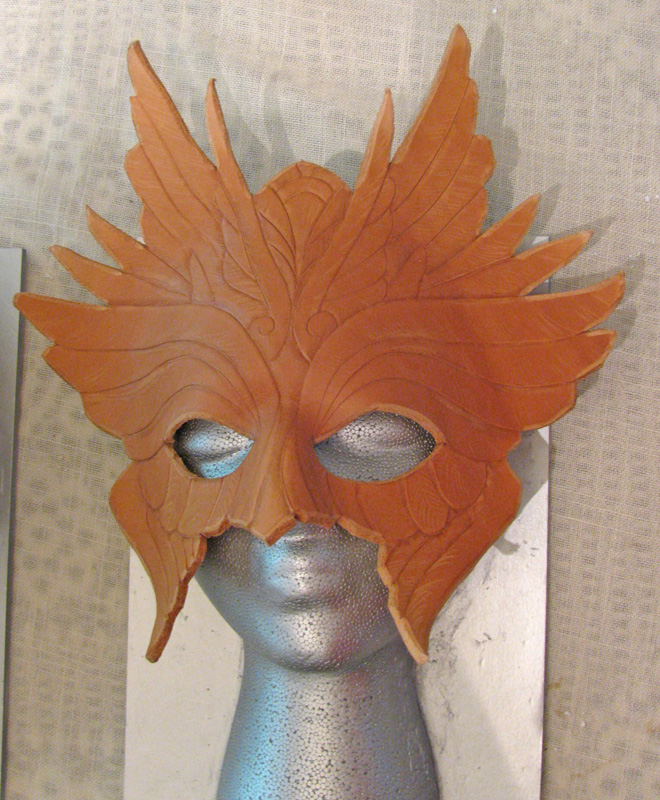
Crafting – I turned to leather and jewelry crafting as a means to de-stress from the burnout I was feeling.  While my art and prints sat there gathering dust not selling, these craft items began to sell consistently. (A good thing, too, or I’d be buried in butterfly keychains and masks!).  I’ve had multiple boutiques come to me asking to consign or for wholesale rates and, best of all, it is something I can do without being sickeningly bored! The slice of the swivel blade and the tedious painting of insect markings is a meditative exercise for me.
Funny how we stumble unexpectedly on passions.  My dad was a leathercrafter in his younger days and I suspect I absorbed some of that passion somehow.  I don’t plan on making crafting my long term career, but as long as it’s bringing in some income, it’ll help me out while I’m seeking out that paycheck work to make ends meet.
In Summary – Skimming out what’s not working, focusing on what is. Hoping my experiences help anyone else out there who might be considering a similar path.  Good luck to us both in this roller coaster called being a ‘creative professional’!

DragonCon 2011 Con Report

Finally! I am sentient enough to write a blog post about DragonCon!  This year was my most work-intensive year yet, despite the fact I didn’t have to man a table.  It was so wonderful to meet old friends, fellow artists, and attend many cool panels!  It made returning home to a backlog of work after all the fun that much more difficult.

My panel on E-Marketing for Artists 101 that I gave during the con is now available online for your viewing pleasure.  It was my first time giving it so I was pleased to be applauded at the end. Next time, I’ll be sure to include even more info based on the crowd’s great suggestions!

I decided to be over-ambitious and do a mixed media display of new digital paintings, jewelry, and masks to reflect my new skillset from the past year.  I’m happy to report I sold half my masks and jewelry and even a couple of framed pieces!  This year was the best I’ve done with a Gallery panel at DragonCon, though Print Shop sales remained lackluster.

Now for a tour of my panel! (See more pics of my gallery this year here).

 
Things I Learned
(Because you always learn something new with every con. Even if you’ve been attending for years.)
  • Mailing labels are your friend! Instead of wasting business cards by using them as title labels, a simple design printed on a mailing label looks even more snazzy AND saves me money!
  • Plastic Sawtooth Hangers look way better than using binder clips on your images (and doesn’t risk creasing your art/bag). The downside: Once they’re stuck on, they’re on for good.
  • Gatorade. The cure for hangovers, nausea, and walking multiple blocks in 85 degree Georgia heat in a corset!
  • What sold this year – DRAGONS (Derp moment on my part as this never occurred to me. Especially for an event like DragonCon), masks, jewelry, and my darker angel pieces.  Seems my craft items are staying my money makers.
  • When giving an hour long panel, drink plenty of water (or Gatorade). I was hoarse for a week after because I rambled the whole time at my panel without sipping any liquids.

Personal Stuff
Being able to wander the con and attend panels was great this year! I learned how to make items out of hardened felt, which opens up a whole new world of crafting for me. I also attended a panel on peasant fashion in the 1650s, which was great cultural fodder for my novel writing research.
A butterfly lady sketch
from Stephanie
Pui-Mun Law.
I also got to yack with Stephanie Pui-Mun Law and, in what’s becoming my DragonCon tradition, purchased her latest Tarot book, The Tarot: Minor Arcana!  Stephanie did a lovely sketch on the inside cover before my eyes, even with my rambling distracting her. Thanks so much for the gift of inspiration, Stephanie! Can’t wait to really dig into this tome. A flip through has already revealed tons of crows, swords, sparkly bods, and awesomeness! It will be good inspiration and motivation for me to get going on my own Tarot project, once I finally sort my direction out.
After two years of saying ‘I might go’, I finally attended David Mack’s charity body painting event hosted at one of my favorite joints in town, The Shakespeare Tavern! There was much talent packed into one place and also organic strawberry beer to be had.  David also signed my present of a rare Scarab figure from a friend, which was the source of much happiness.
I was also free to wander around snapping pics of costumes this year. You can see my meager collection of costume photos here!  If you want to see videos of my friends and I being stupid at the Night at the Aquarium event, check out Derpy Eels and Rockout Fish videos.
I’m not so sure if I’ll be able to make it to DragonCon next year with other events like SDCC and Spectrum Live Art tempting me, but after the success of this year, I’m definitely going to try!  Till next time, guys!  I’m already plotting a costume.

DragonCon 2011 Workbench Part 2

The saga of ‘Angela why did you decide to have a book signing and a gallery show just before DragonCon and then start your gallery panel stuff too late?’ continues!  Spent the last 3 days painting like a madwoman!  You saw the naked leather masks, now see them with COLOR!

Behold my PRETTEHS! That’s a little pile of stuff to be turned into jewelry and
bookmarks at the end.

A Black Swan mask. Heavily inspired by the look of
the movie with Natalie Portman. Still need to add
crystals to the crown in this one!

Seraphim mask. If my brain wasn’t broke before,
it was after this mask. Possibly adding gold chains
to this?
Tarot: The Moon mask. Or also “Moon Bonnet”.
She’s going to have a ‘necklace’ of fresh water
pearls attached.
And finally, the DRAGON Mask!  Totally dig how this came
out.

 They all still need varnishing, which will add an extra layer of candy-like awesome, but are otherwise done for the most part!  Stuff I still need to do:

– Finish displays for the bookmarks
– Finishing touches on the masks/jewelry that need dangly parts
– Mat and frame things. Embellish mats that are not LE
– Label everything properly for the art show
– Finish presentation for E-marketing panel in the art track
– Maybe do costume bits for a Lusiphur cosplay?
– EAT YOUR BRAINZ!
I can haz yer brainz? ;_;

DragonCon Workbench & Reminders

Pulse check since I have been too busy working to post here!  I am alive, for the most part.  Neck deep in DragonCon prep!  Just wanted to remind folks of a few things:

  • I will NOT have a table this year.  I will, however, have a large gallery bay where you can see and purchase paintings, matted embellished prints, masks, and other handmade specialty items.
  • In lieu of a table, I’ll also have a space in the art show’s Print Shop, where I’ll be debuting lots of new pieces never before available in prints (such as Keeper of Secrets, Angel of January, and Dragon Whisperer).
  • I will be hosting a panel on the basics of E-marketing for artists in the Art Track (based on a blog post of mine). Check your D*CON schedules for exact listings!

And now for some image spam of my current workbench, which is full of masks and leather things!


A closer look at that dragon mask. Cuz I just love it!

Tentatively titled “Seraphim” and jokingly titled
“Flouncy Hawkgirl”
 Now, just got to survive till the con! With the power of Greyskull, chocolate, Advil, and coffee!

Happy Happy Insanity Time!

Also known as the “Pre-DragonCon Rush”

So the insanity is in full swing now with T-minus 30 days till DragonCon and still many paintings and leather crafts ahead of me!  Not to mention I have recently received some life-changing news, but I’m loathe to reveal it now until we know for more of a certainty! (Don’t worry, it is nothing bad!)

I’ve been meaning to post here about how my career is changing (which partially ties into the good news I can’t talk about yet), but that’s something for a later entry as well I think.  For now, just announcing I’m busy as HFIL, my Etsy and Artfire shops are both in vacation mode till after September 5th, and that I’ll be at DragonCon this year with bells on.  I’ll be debuting new prints of such glorious arts as these in my Print Shop and Gallery panel at the con!:

“Angel of January” 11×14 in., Pencil colored in Photoshop.
“Keeper of Secrets”, 11×14 in., Ink colored in Photoshop

You really must go see my gallery panel this year.  It will be like no display I have ever done before with paintings and leather crafts, galore!  I don’t have a table this year, but I’ll most likely be wandering the floor of the Art Show or helping Windfalcon at her table.  We’ll be at the Masked Ball on Friday as well. (Oh but I still need to figure out what to wear!)  We may very well see the return of Captain Evelyn (my pirate alter ego), if I can fit my art-fattened patooty back in that costume!  ALSO, I’ll be hosting a panel called E-Marketing for Artists 101, so check the Art Track for schedule times!

Hope to see you folks there!  If the grumpkins don’t get me first….

Sketch Diary: Angel of January Part 4

Continuing from the last sketch diary entry detailing the battle of wills against horrible color schemes.  I wasn’t quite sure how to compose this next entry, as I couldn’t quite figure out how to record my many hours of tweaking in Photoshop nor do I want to confuse you with the cluttered mess that is my digital coloring method.

I am relatively new to digital painting so I haven’t quite figured out the most efficient way to paint yet.  How about a list of things I learned during this painting that made me fear digital coloring less instead?

Learn the use of Layer Masks and Adjustment Layers!
Being able to tweak the contrast, color, etc. of an image without destroying the integrity of your original image will save you many headaches in the end.  Layer Masks are especially helpful if you want to integrate textures into your image with a more natural feel while Adjustment layers let you tweak elements such as Levels, Contrast, etc. while still keeping your original image untouched.  For example, I used a Gradient via a Fill Adjustment Layer to get the subtle green glow in the texture of the marble behind my angel in this painting.

(Peter Morhbacher has some great tuts on using masks and integrating texture, “How to Apply Texture Without Looking Like a Douche” and “Masking Tutorial” ).

Creating convincing light beams is totally easier in digital.
Wish I could say it was my brilliant idea that resulted in the light beams coming from the top left on my painting, but it was from this jewel of a tutorial.  I used the thicker beams they mentioned in another tut by the same person.  A gal could get used to not having to mask off with tape or masking fluid or painting around the light shafts like I would in watercolor. Hoorah for saving time!
Blending takes time…even in digital.
90% of my time on this image was spent blending and blending and BLENDING some more, especially in the area of her skin.  I used default brushes set to Pen Pressure and an Intuos3 Wacom tablet to color this image. In my experience so far, if you want your image to maintain that painterly feel, it’s better to blend with brush strokes than rely on gradients or fills. It’s far too easy for things to look sleek and plastic in digital so watch yourself! 

Another trick I used to maintain a subtle texture in this painting was to insert texture from free texture sites in layers set to Overlay and attached to the various elements of my image with Clipping Masks.

For things like the skin and hair, I used roughly three default Brushes set to varying Opacity and Scatter settings. I’m sure there’s a whole world of custom brushes to discover, but these are the ones I used, in addition to the default Chalk brush, which I used to simulate the color pencil lines when I needed to touch up my color pencil layer I had scanned in from my original drawing.

A little texture goes a long way!
Critique is priceless, no matter the medium!
As much as I’d like to say this image popped out of my head sparkling and awesome, it looked like crud during a midpoint when the angel’s skin was purple, the window was floating and overwhelming, and I was frustrated with it.  That’s when turning to more experienced digital artists really saved the day! 
Sam Hogg and Stephanie Reeves gave me wonderful advice, paint overs, and encouragement and that is just what we need when learning a new medium, so don’t be afraid to check out places like CGsociety and Conceptart.org (or your own arty friends) for critique!

I did a time lapse video of all of my progress shots. Next time, I’ll try a screen recording program (any reccomendations from you guys?)

And finally, the finished image!
“Angel of January”, 11×17 in.
Digital painting over color pencil outline.
Download a wallpaper of this image.

DragonCon, Important Announcements, & a LOLcat

Well…it’s T-minus 2 months till DragonCon and in that time I have 4 paintings and 18 leather pieces to finish in time to display!  Luckily, this year I don’t have to prep for stocking an entire table, just the gallery panel. 

Have a sneak peek of my layout!
See all those text squares and scribblely thumbnails?
Yeah that’s stuff I need to finish still…

I’m actually looking forward to having the freedom to wander about and schmooze with folks and maybe attend a panel or two this year!  I’ll be hosting a panel on E-Marketing for Artists 101 in the art track, so be sure to keep an eye out for an official schedule so you can come talk shameless plugging with me!

With current workload, I’m pausing commissions till September.  So if you’re currently waiting on work from me, I ask that you please be patient with my slow pace.  If you’re interested in work, never fear, for I will be keeping a waiting list in the meantime!

Now, off to work with me!  You have been warned.  When next we meet, I may look like….this:

PS.
You local peeps in the vicinity of Georgia, come on out to my art opening this Friday!  There’ll be books, bookmarks, and an entire meditation room dedicated to showing my original art. Plus the backdrop of a really cool bookstore with jewelry, gemstones, and KITTEHS! Also, free food!

C’moooon…you know you want to come!

New Product Blog & Twitter Name!

As you may have guessed from my recent poll, I’ve been pondering on ways to better reach people interested in my items for sale. I used to have a forum where I posted store listings, but it ate itself! With my items being spread across my Amazon Shop, Etsy, Zazzle, and Artfire, there seemed no efficient way to get the word out on what’s available where.

Now, I’m pleased to present the solution, the Angelic Shades Product Blog! This is the place to subscribe if you’d like to see instant listings as soon as products and special offers become available. Many of my items are Made to Order, but there are still others (like my jewelry and original art) that are one-of-a-kind, meaning once they’re gone, they’re gone! Watching the blog is the best way to get first dibs on specialty items before they’re gone and to keep up with what specials are going on where across my online outlets.

I’ve also created a Twitter username dedicated solely to product updates, for you Tweeties out there. This will help keep my main Angelic Shades Twitter from being too spammy so it can stay focused on art and fun!

If you hate leaving the safe confines of DeviantART, never fear! I’ll be posting a monthly collection of new items in one tidy Deviation once each month that you can favorite and revisit whenever you like. They’ll look a little something like this:

This should keep people from being spammed (unless they want) and help get the word out for me in a much easier to manage way!
Aah organization! I feel better now.

Sketch Diary: Angel of January Part 3

The ideas have broiled, the sketches have been kneaded to perfection, and now we reach the most difficult phase of this image for me – coloration. Normally, this is the phase that’s the most fun, but this image fought with me tooth and nail to defy my whims!

Problem #1 – Being a monthly series, I have a limited palette of pre-defined colors to work with which are restricted by the main elements, the flowers and birthstones for each month. In this case, my choices for January are garnet, carnations, and snow drops.

Add on top of that I want to have a ‘stepping into sunlight’ theme with sunbeams streaming in and the challenge becomes even more tricky! Lucky for me at least that carnations come in many colors and snowdrops are a neutral white. I’m not sure how lucky I’ll be with the rest of these angels that have flowers available in one color only!

The first idea I had was to have the realm of Spring beyond the ‘doorway’ in the image, so that bright area of contrast was fighting with me as well. I did quite a few color tests in digital and watercolor, the disasters of which I’m almost embarrassed to share:

After doing these, the idea of a glowing halo around her body
was dropped in favor of not going insane from dueling colors
and light sources.
The talented Sam Hogg took a stab at it with her digital awesome powers:

While I like the simplicity and contrast of Sam’s color scheme,
the window felt too dark for my tastes.

Springboarding from Sam’s theme, I lightened it up with
sunbeams and a sunrise themed ‘spring’ realm behind her.

Before the end of this color testing phase, I decided I wanted to try this image digitally instead of in watercolor to help me brush up on my cg skills (and also because the color richness demanded something more bold than watercolors).  To keep that subtle texture of my line art, I scanned in the color pencil outline version to use as a base to color on:

Outlined in Prismacolor Color Pencils. The color of the lines gives a deeper
optical richness to the final piece than simply using black outlines.

Eventually, I arrived at this final complimentary color scheme with orange
accents. The idea shifted to sunbeams penetrating a subterranean underworld
which pushed everything green! (Thanks to Hayley‘s critique)

 It’s at this step that I’ve added textures from free texture sites and my own references to help add texture and interest to my digital shading.  The color pencil outline layer sits above all of my other color layers and is set to Multiply so that all the color layers beneath it will be visible while maintaining their color value and the color tint of the outline layer.

The color layers each have texture layers above them set to Overlay so that the texture will be very subtle and show the colors beneath it. In the next entry, I’ll go more into depth about my digital color process. It’s all very experimental at the moment. Maybe a video will be more helpful here?

Sunbeams, glimmering dust motes, and jewels glittering in the dark await! I’m excited to get started shading this painting digitally. Got to keep my digitalart-fu strong!