Category: traditional painting

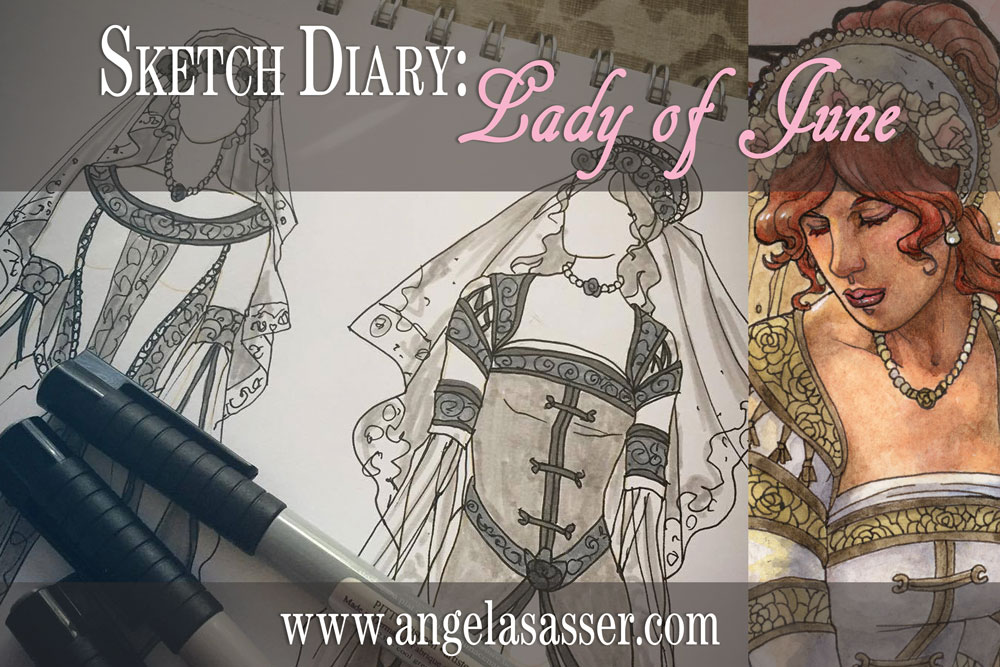
SKETCH DIARY: Lady of June

My journey continues this month with Lady of June!  Lady of November represented a milestone of high quality and attention to detail in this series that was hard to beat!  How could I make the rest of the Ladies as good as November?  That was the difficult challenge I set for myself as I moved on to this month and ventured into the first of the Ladies of summertime!

After the dark whimsy of Lady of November, we’ve returned to the Ladies of Summer!  Admittedly, this Lady has been a challenge thus far.  While November had a lot of amazing imagery to play with, June is more of a subtle time of year.  Its celebration of youthfulness and young brides reminds of May’s themes, with one of the only unique events being the Summer Solstice.  I’ve been struggling to find Lady of June’s unique visual story to make her different enough from the other Ladies, but that’s what research is all about!

MOOD BOARD

One of the most prominent themes I found while researching the Summer Solstice via Pinterest image gathering was the celebration of Litha and the Sun Wheel.  The Solstice celebrates the reigning power of the Sun.  The Sun Wheel was an old tradition where a representation of the sun was set aflame and rolled down a hill to symbolize its shifting phases.  As soon as I saw the Wheel, I knew it’d be the perfect inspiration for the mandala window!

RESEARCH NOTES

Research for the Ladies always begins with the origin of the month’s name.  In this case, June was named for Juno, the goddess of marriage and well-being of women.  She was also wife to Jupiter/Zeus.  I look across different cultures and see what about this time of year strikes a chord with humanity.  June in the northern hemisphere is a high point of Summer, a time of divination, and a powerful phase of feminine power.

Writing notes helps me to search out the imagery and symbolism I want to include in this Lady’s painting.  I think of flowers, plants, and brides.  The symbol of the well as a tool of divination also struck a chord with me, which is why it shows up so much in my thumbnail sketches.


 THUMBNAIL SKETCHES

Many of these thumbnails explore using water in a well or pond as a divination tool.  2 and 4 feel a little close to Lady of March, with 4 feeling a bit more like a representation of Vanity.  3 captures a more traditional bridal theme, while 1, 5, 6, and 7 seem to capture that theme of a bride searching for her love in the reflection for a more unified theme.  In the end, my favorites are 1, 5, and 6, with 5 and 6 having the clearest shapes and classical feel.

Character Posing

Read more

Lady of March Set

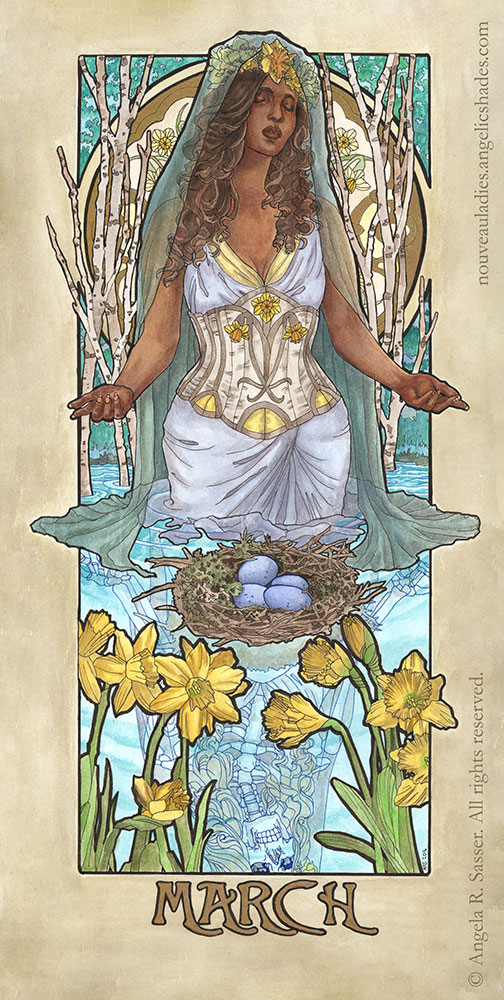
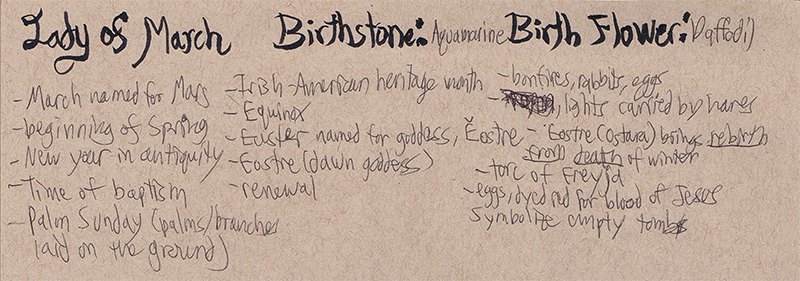
The Lady of March bears Daffodils and dons the stone of Aquamarine.  The Daffodils represent chivalry and unrequited love. The Aquamarine will bring her foresight, courage, and happiness.

She ushers in a time of resurrection, renewal, and the bursting forth of new life.

Without further ado, here’s the final version of Lady of March from my Ladies of the Months series!  Created with watercolors, sepia ink, and metallic liquid leaf on illustration board.

lady-of-march-lowres


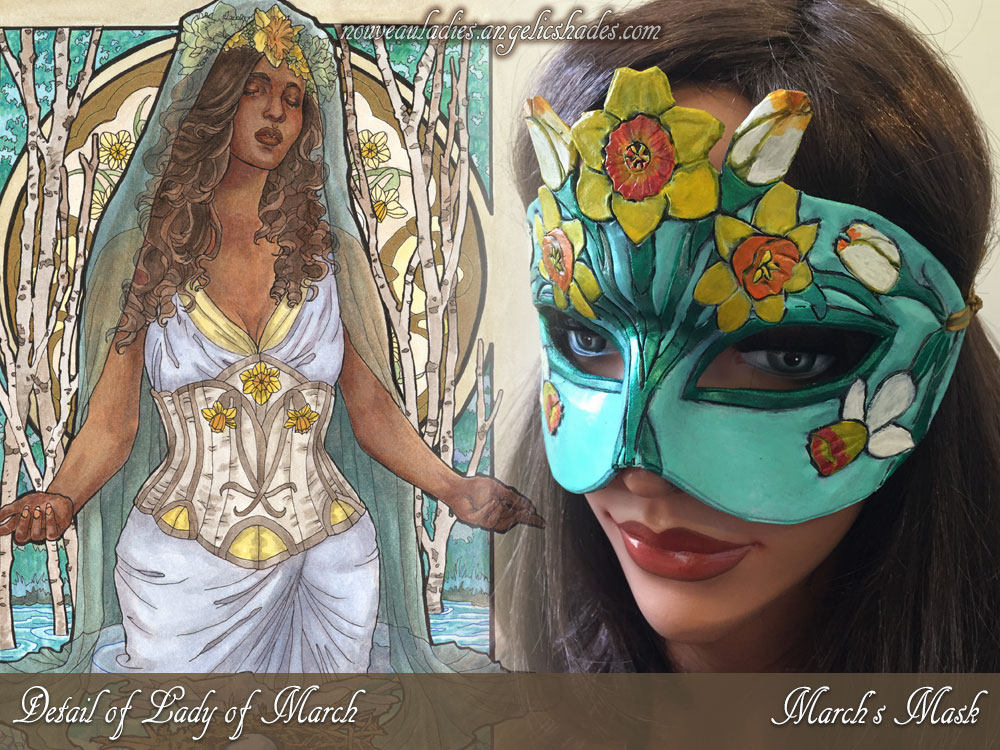
The Lady and her matching mask:

Lady-of-the-Months-Montage-MARCH


ORIGINAL ART: Available on Etsy.
ORIGINAL MASK: Available on Etsy.
OPEN EDITION PRINTS: Available on Etsy.
LIMITED EDITION PRINTS:  Available only via Patreon. Read here for details.
COLORING PAGES: Available via Etsy and Gumroad.

BEHIND THE SCENES:

Sketch Diary for the Painting
Design Diary for the Mask

PROCESS VIDEOS:

Creating the painting:

Crafting the mask:

For more about this series, see the Ladies of the Months dedicated site!

Sketch Diary: Lady of March Part 3

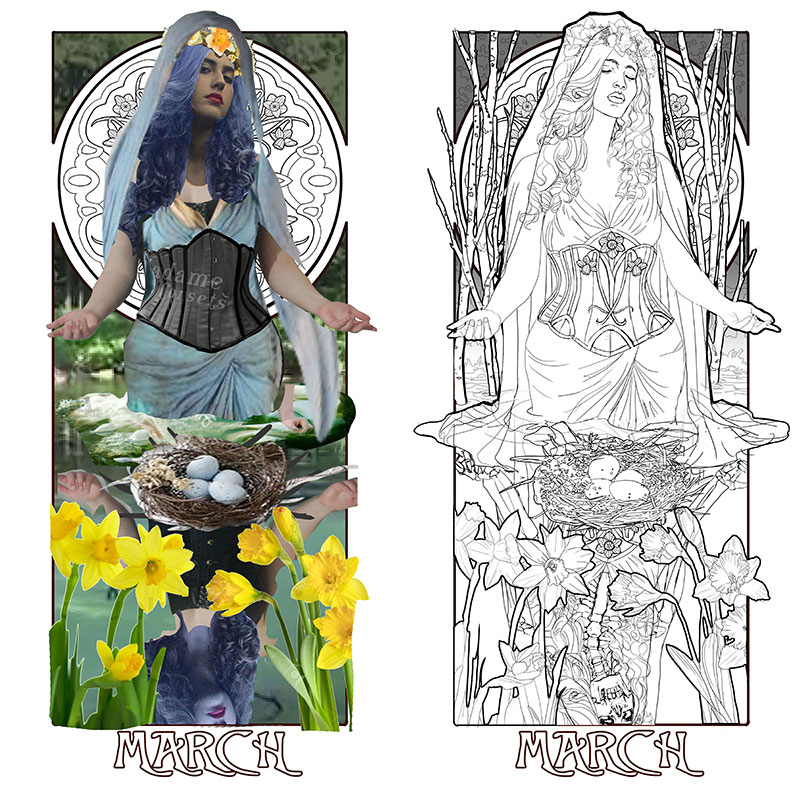
Last time, I talked about designing the narrative elements.  Now, I’m excited to start pulling everything together into a cohesive piece!  Working in Photoshop CC and using a Cintiq 21UX, I use a composite created from my reference photos as a basis for a rough line drawing.  Sometimes, it’s impossible to find the perfect pose and that’s where Photoshop can be really handy.

I’ve used the body from the photos I took, the head from another photo whose facial angle I really liked, and other reference photos (not pictured) to help me change the look and features of the model.  One of my intents for this series is that it should encompass all forms of beauty, including diverse women from different ethnicities.  I don’t want every Lady to look like me, since I’m primarily the model (a fact I hope to change once I can afford more models).

lady-of-march---composite-lowres

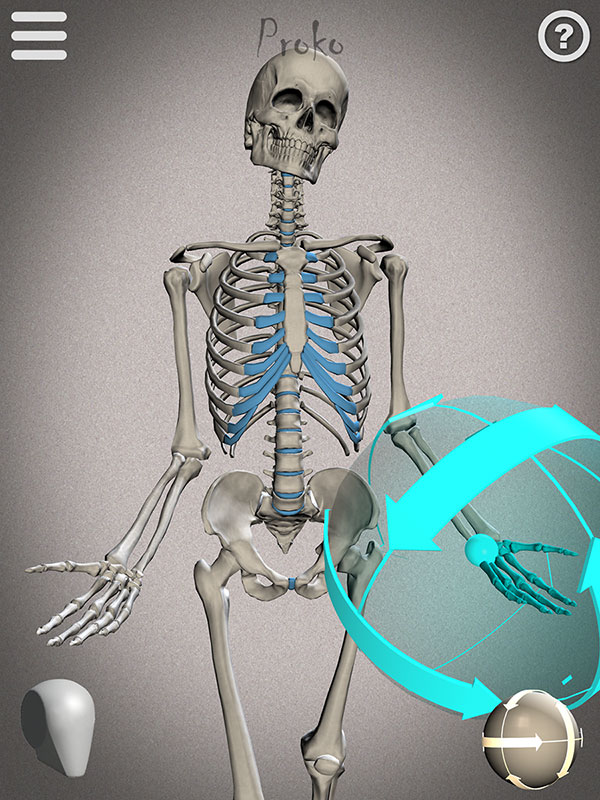
I also wanted to share this screenshot of the reference I used to draw the skeletal reflection from Proko’s Skelly app for Apple and Android.  It’s fairly easy to use and arrange with poses you can save.  I’ll definitely be using it more for study!

lady-of-march---skeletal-pose-lowres
With my line art figured out, I can finally move on to testing out a basic color palette for Lady of March.  I know I want a theme indicative of Easter, so I’m mainly drawn to gold, yellow, and blue.  The first thing I do with any of the paintings in this series is to make sure the birthstone is represented also through the color palette as well. Luckily, the greenish blue hue of Aquamarine suits my concept for this piece rather well!  This color takes up the majority of the background and influences the rest as well.  The only other element I’m sure about at this point is that I want the eggs to be the bright blue of robin’s eggs, which always make me think of Spring.

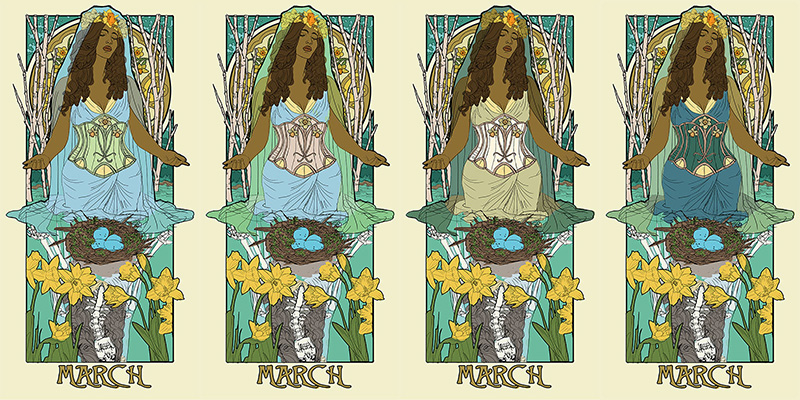
I use the Hue/Saturation slider in Photoshop on each element to see what color choices might surprise me.  I explore different options, including a dark dress or a light veil.  The 1st image is perhaps too monochromatic in the clothing so that the corset stands out too much.  The contrast between the dress and veil in 2 works well while the bodice also brings out the beige of the trees from the background so there’s more color circulation throughout the piece.  The 3rd and 4th images both have a nice clear silhouette that’s intriguing, but starts to get away from my liking of stronger blues and yellows in this piece.  I should also note that I try to keep the yellows subdued throughout this piece, except for the flowers, which are the strongest focal elements.

lady-of-march---color-test-lowres
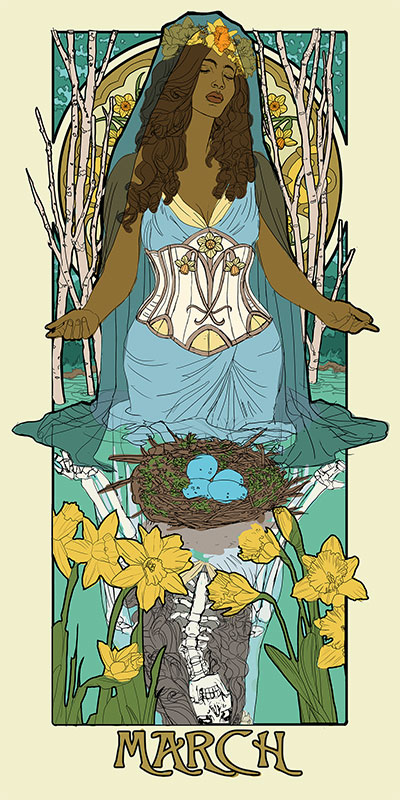
Finally, I arrived at a color palette I consider to be the best of all worlds!  The dark veil allows a strong silhouette for the figure while the pale corset and pale blue dress work well together, leaving the eggs and flowers as the most saturated symbolic elements in the piece.
lady-of-march---color-final-lowres
This has been your final sneak peek before I unveil the final painting! You can see the unveiled piece here.

Watch a time lapse of the painting:


Want to see these Sketch Diaries before everyone else?  Consider pledging at my Patreon!
You’ll get early sneak peeks plus other exclusive Rewards!

Part 1 – Conceptualization
Part 2 – Narrative Elements
Part 3 – Preliminary Drawing

Sketch Diary – Winter Offering

Inspiration: Every year I do a painting to spread the cheer of the winter holidays to my fans, friends, and family.  Keeping in that tradition, I created this piece entitled “Winter Offering” for 2015.

I wanted to capture the quiet warmth of candles, which are one of my favorite decorative elements of the season, and pay homage to some of the Celtic traditions that define the holidays with the presence of evergreen holly and pine.  I also wanted a celestial theme for the window to represent the dark, cold winter nights which the light guides us through.

Tools and Techniques

For this painting, I used Photoshop CC and a Wacom Cintiq 21UX.

References

ref-winter-offering

A selection from my references. 

Art Process

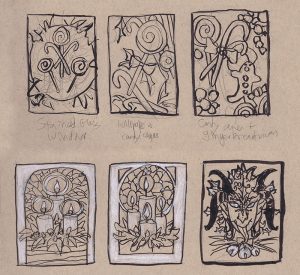
Step 1 – Thumbnail sketching with ink and white color pencil on toned paper to find the right idea. At first, I wanted to do a candy theme, but the candles struck me with their simplicity and elegance. The Krampus one was also a fun contender, but I decided to save him for another time.

wip-candles-thumbnails 

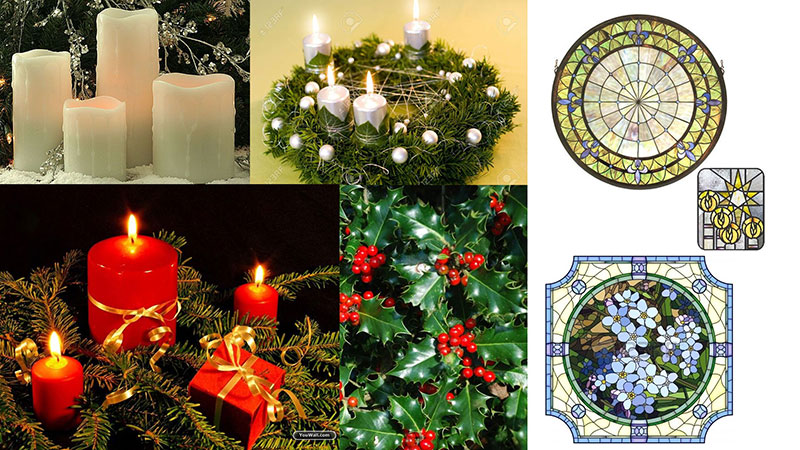
Step 2 –  Reference gathering! I looked at many Tiffany glass windows, wreaths, and white candles for inspiration.  I keep a secret reference board for my yearly holiday images on Pinterest.

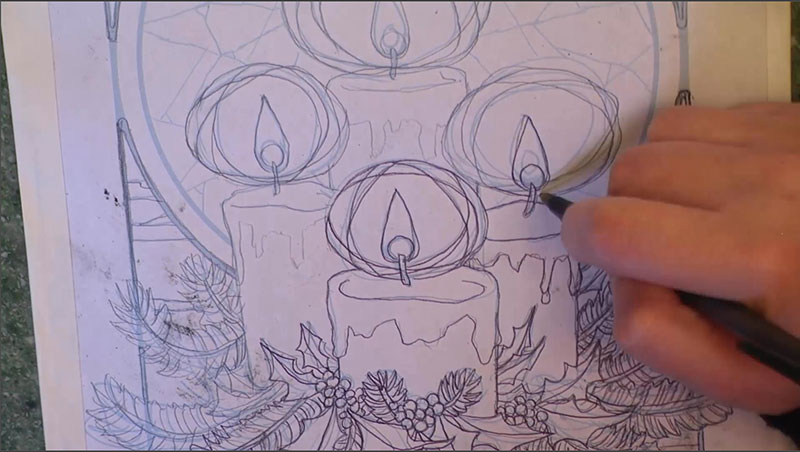
Step 3 – I did a rough sketch in Photoshop keeping loose and quick.  The sketch was then printed out and refined with pencil sketching on top of the lightly printed line work.

christmas-2015

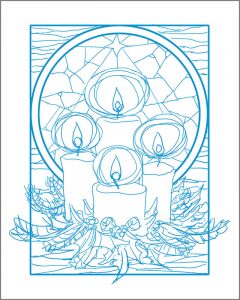
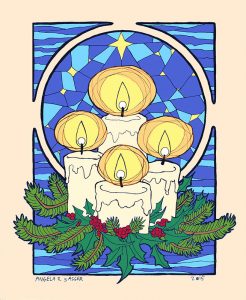
Step 4 – This refined sketch was then scanned in and the lines turned blue so they could be easily transferred.  I also used the same refined sketch to do a digital color test so I had an idea of my colors before I put paint on paper.

winter-offering-color-test

Step 5 – The refined sketch with blue line work was then printed and transferred with graphite dust applied to the back of the printout.

transfer-process

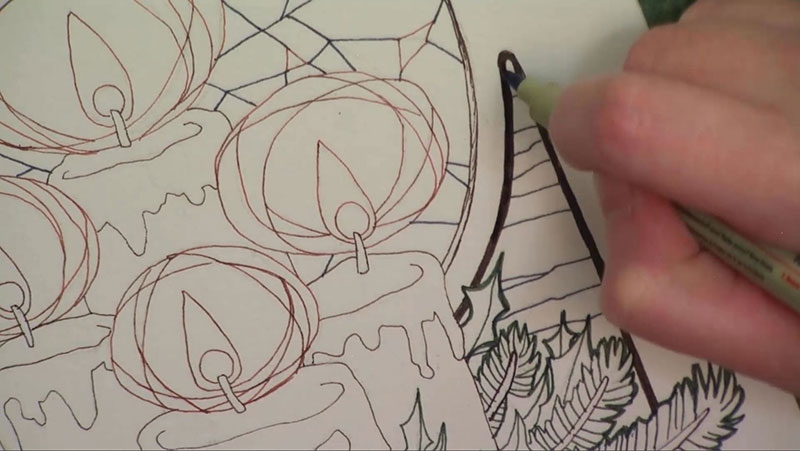
Step 6 – The transferred line work on the illustration board were inked with various colors of mechanical pens for visual contrast and interest.

colored-ink

Step 7 – The ink drawing was finished with watercolor paints.

You can also watch the 5 minute time lapse video of how I created this painting here!

For more in-depth instruction on how I created this image, including the brands of materials I used, tips on creating a stained glass style in watercolor, etc., pledge to any $10 and up level on my Patreon to gain access to the narrated video tutorial!

You can also buy the individual tutorial separately at my Gumroad shop, but you won’t receive the other extras you would by purchasing via Patreon.

VIDEO: Lady of January Tutorial – Part 1 – Creative Process and Design

This video dropped earlier this week for my Patreon Patrons and Kickstarter Backers. Now here it is for the public!  Enjoy and feel free to leave any questions in the comments.

I plan to post the next part with the actual painting process next week.  Again, if you’re a KS Backer or a Patreon Patron, you’ll see it before everyone else.

My Kickstarter project could still use your help!  If you know anyone who might be interested in my project, please spread the word to them.  It’d be much appreciated!

SKETCH DIARY: Lady of January

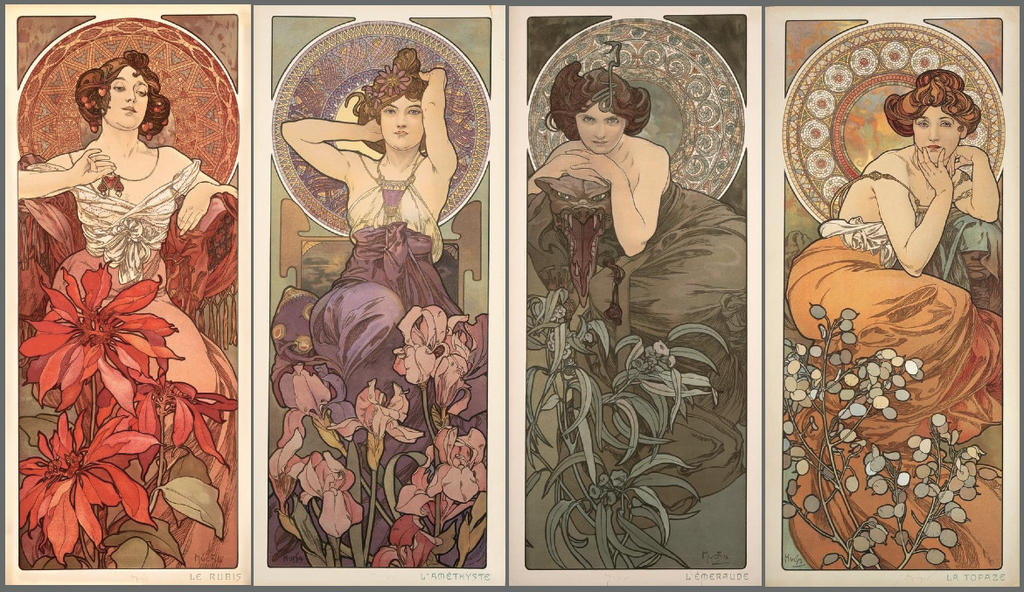
This series began as my annual Christmas card back in 2012 and as a homage to Mucha’s stunning series “The Precious Stones”!  I’m a long time fan of Alphonse Mucha ever since I discovered his work years ago in college and fell in love with his graceful, intricate compositions.  I thought it’d be fun to challenge myself to an entire series in this detailed and decorative mode of work.  The Lady of December sat alone as the only entry into this series until I recently decided to pick it up again!

The Four Gemstones by AngelaSasser

“The Precious Stones” Female figures embodying the gemstones Ruby, Amethyst, Emerald, and Topaz.

Lady of December by AngelaSasser
“Lady of December,” Digital Painting, 2012.

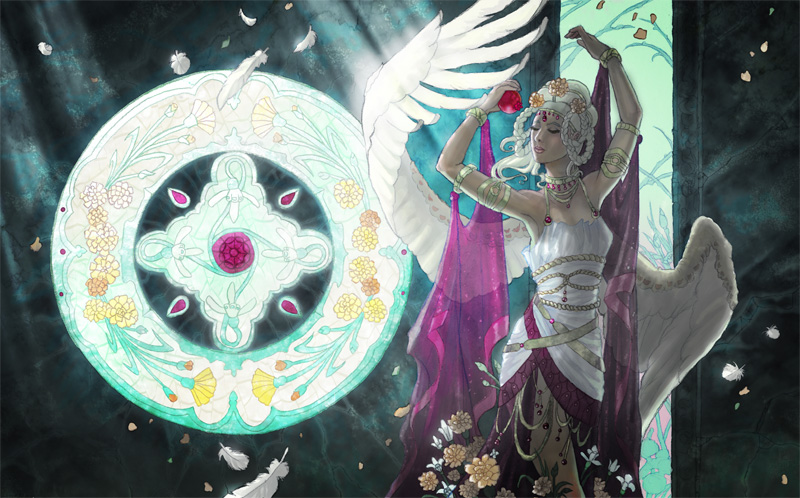
I had tried to do a monthly series before in the form of a series of angels, but I wasn’t quite satisfied with the layout of the composition of the first entry in this series.  The window and the figure felt disconnected, while the background seemed too empty with too much wasted potential.

Angel of January by AngelaSasser
“Lady of January,” Digital Painting, 2011.


Read more

7 Things About Digital Painting from a Traditional Artist’s Perspective

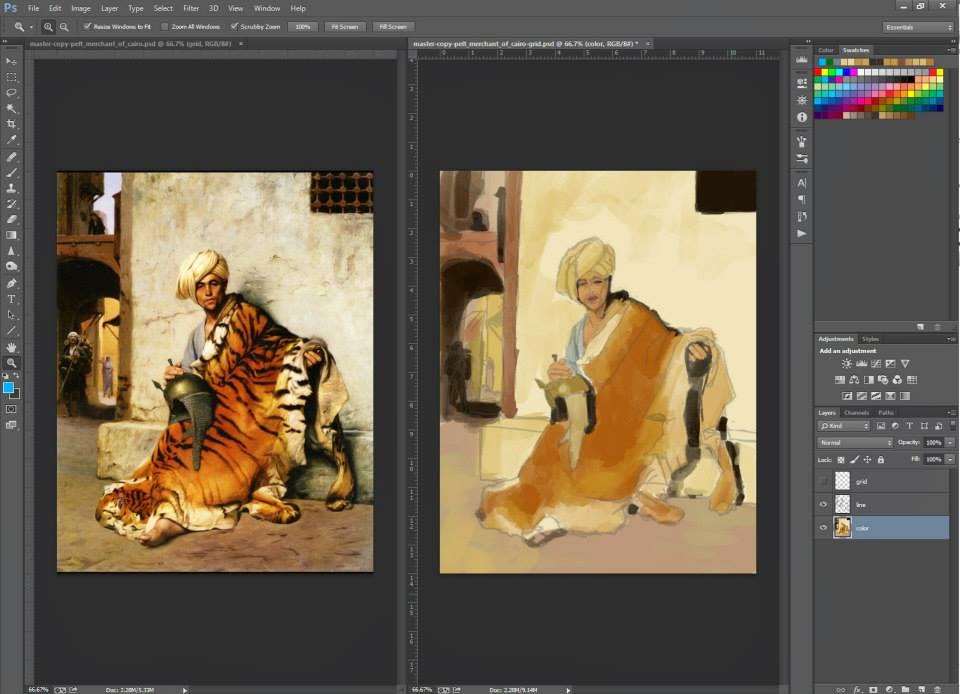
My master copy of a traditional painting with digital paint.

It’s been a frustrating and gratifying experience for me as a watercolor and color pencil artist to switch to painting digitally.  There are so many glorious things about digital just as there are so many things that can make it really difficult to master.

Here are some of my random observations on the digital painting experience as someone with a background in traditional painting.

1.  Digital is NOT Faster

No, digital is not faster.  Perhaps it is if you aren’t trying to replicate the look of traditional paint.  But in my experience, particularly when replicating a painterly look in digital, you’re going to spend a lot of time layering and layering just to get rid of the pure plastic colors that digital brushes apply by default.

There are some ways around this mechanical computer generated look, such as scanning in your own textures from traditionally painted swatches and programming them into your brushes.

Corel Painter and Photoshop have brushes you can program to emulate this randomness, but it’s not as good as the real thing just yet.  There are still too many patterns that are predictable that the eye recognizes, like computerized paper texture, which contributes to that sameness that so many digital pieces have that I mentioned earlier.

Plus, if you’re a control freak like me, you’ll spend many an hour trying to paint everything at the same level of detail until you realize that zooming out makes all that work for naught.

2.  Addiction to Layers

It is so tempting when you first start painting digitally to just have everything on multiple layers.  Why wouldn’t you?  You can control all the things ever and make everything PERFECT!  Don’t fall into the trap!  Merge your layers when you can.  For one, merging layers is easier on your computer if you don’t have a lot of processing power to spare and makes your files less humongous.

Another advantage of merging your layers is that you can retain those ‘mistakes’ that make traditional paintings have that lovely painterly feel to them.  Painting over your mistakes instead of deleting them creates a ghost or haze that makes your edges feel more organic, while merely selecting and deleting leaves a perfect edge.  Our human eyes are very keen to patterns and perfection, which can make an image seem harsh and plastic, a very common occurrence that makes many digital paintings have a certain sameness to them.

A suggestion if you’d like to change your image later is to save your selections as Channels, that way you can still retain the advantages of painting on one layer.

3.  Addiction to Undo Button 

Now that I’ve had the ability to Undo every tiny mistake, Step Backwards, Step Forewards, and change every little pixel, a weird thing has happened when I sit down with a traditional pencil and drawing pad.  I am downright afraid that I’m going to mess it up!  My ultimate power of control is gone and I’ve lost my confidence with dealing with traditional media.  If I pick the wrong color, that’s it, game over, man. GAME OVER!

It’s going to take some re-training to get my confidence back that it’s okay to make mistakes.  Digital has made me the ultimate control freak, whereas traditional media is all about letting go of that control and accepting the somewhat randomized results of how the media works, especially with something like watercolor.  For me being the control freak that I am, traditional media helps to balance my propensity for spending too long trying to make everything perfect.

4.  Mark-Making Still Matters

At least if you want to achieve a painterly quality in your digital work.  A lot of folks assume you can just drop a fill into a digital canvas and you’re done.  While you can achieve certain kinds of highly stylized effect like this, if you’re aiming for a more realistic painterly organic effect, your lines still matter.  Blending takes time and care and usually the same awareness of your marks and how you’re using them to define contour as you would have as a traditional painter.  

Also, things that might happen more naturally with traditional media, such as the pooling and blending of colors that form that wonderful randomness in your skyline take dedicated effort to achieve in digital.  In digital, randomness is carefully constructed.  You have to add the randomness to your skin pores to make that surface convincing. It doesn’t just happen thanks to the properties of your paper, glazing, and pigments.  Filters and Brushes with custom effects can help.  They get better with every version of Photoshop, but they still have a ways to go.   I haven’t used Painter much, but I hear it’s getting better at this as well.

5.  Shiny Plastic People

I don’t know why, but when I first got into digital, I assumed it’d be easier to paint skin.  There were all these nifty tools and pore brushes and amazing things that seemed to do all the work for me!

Nope.  All I got for about a year of painting people digitally was shiny plastic grey people or shiny plastic pink people.  It took master copies, many failed practice paintings trying different techniques, and brushing up on my color theory to really start bringing life to my skintones.

I still think every time I paint a person digitally that I try a different technique each time.  The more I paint digitally, the more I realize it isn’t about how you do it and any one right way, it’s about doing whatever it takes to get a good looking end result!

6.  Missing that Good Ol’ Tactile Feeling

For as amazing as digital is, I’ve found I still can’t get the same finesse with my lines, especially with inking.  Cintiqs are amazing things made of unicorn dust and the tears of artists, but you still have to rotate the canvas with Rotate View, which takes that many seconds longer than just turning your canvas in real life.  I am personally just faster at working with sketching and inking on paper, which I hope to integrate in my upcoming digital pieces.
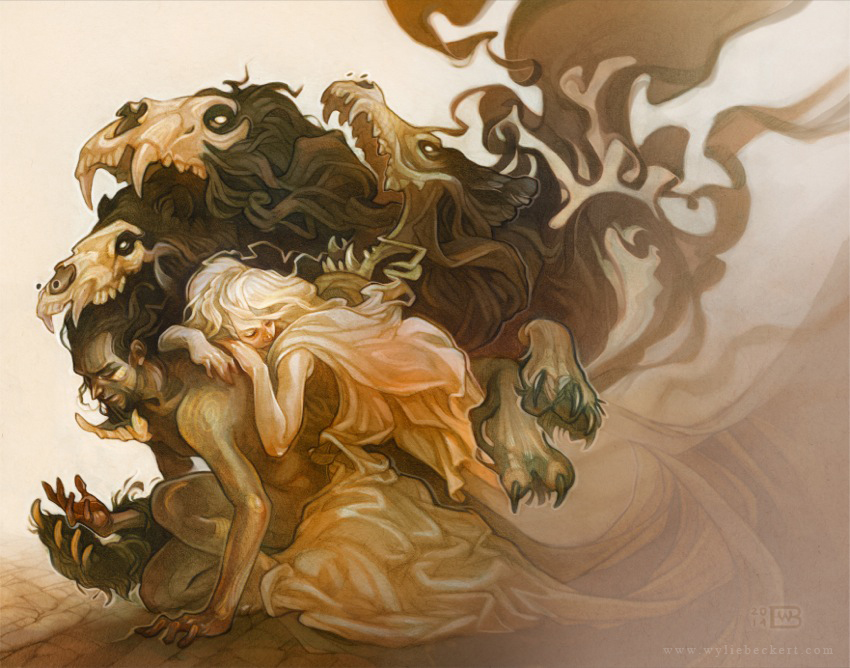
Here’s just one example of Wylie’s
amazing combination of graphite
and digital.

I used to think I shouldn’t mix media like that because I wouldn’t know how to categorize it online or that the purists would hate me (leftovers from my own snooty traditional art program brainwashing), but now I realize I just don’t care as long as I get a cool image in the end that tells the story I want to tell.

See the work of Wylie Beckert as a great example of what you can do when you free your mind to the potential of combining traditional and digital.

7. Layer Masks are Your Friends

Learn them. Love them!  I used to paint everything the hard way and then curse myself when I’ve made a mistake I can’t take back because I’ve overpainted or deleted my original layer.  Layer masks allow you to retain your original work and visually change it without having to commit to those changes.  I’m probably speaking voodoo moon language right now to those who have no clue what layer masks are.  To you, I say start here.  Learn, my grasshoppers. You will not be sorry!

And yeah sure it may lead to the ‘Undo Addiction’ I was previously talking about, but that’s okay!  As long as you have the useful potential of layer masks available to you, you might as well use it and face your Undo addiction later like I’m doing.  You’ll get over it…eventually.

So why do I keep painting digitally if it seems like it drives me crazy?

– I don’t have to keep the paintings under my bed. I am seriously out of space for storing them in our apartment (and parents’ basement).  No, I don’t want to pay for environmentally controlled storage because I am cheap/broke and that type of storage is friggin expensive.

– Being able to change an image indefinitely comes in handy!  When a traditional painting is done, I usually can’t change it much. However, if something ever bothers me about a digital piece or a client requests a change, I can most likely go back and fix it after it’s done.  This is also a double-edged sword which sometimes makes me feel like my work is never done with any particular digital piece, leading to obsessive necromancing of my older pieces.
Also, if I mess up in the middle of a piece, I don’t have to start it from scratch as I would if it were traditionally painted. I can simply alter what segment of the image I need to.
– Solvents are dangerous and I don’t want them near me. I would try oil painting if I could, which is really the effect I’m trying to achieve in digital, but there is no ventilation in this apartment. Experimenting with water-based oils and non-ventilation friendly solvents is going to take time I don’t want to commit at current (and again that storage issue).
– Because I can play with color schemes in a fun way that lends itself to discovery (IE. love me some Hue slider!)
– Digital images are great for clients who need their images easily scaled to different products and sizes without having to go through the process of having to scan/photograph a large traditionally painted piece.
– On the occasion I want to animate parts of an image, digital is SOOOooo much easier to do this with!

    For me, digital is an extremely useful and versatile tool.  While I understand why someone would find a traditional piece to have more sentimental value because an artist was able to touch it and pour their soul into every stroke, I’m the kind of artist who doesn’t paint for the process (at least on most occasions).  
    I paint for the final image and the story it tells.  
    Digital expands my vocabulary for visual storytelling in unexpected ways that I have learned to love and that have made my journey so much more efficient in many ways!

    So I ask you, purely digital artists, what are the challenges you face trying to learn traditional media?  It’d be fascinating to hear from the other side of the learning divide!