Category: art exercises

Proko’s Figure Drawing Fundamentals – Lesson 2 Homework

figure-drawing-fundamentals-blog-template

You can watch the free version of this lesson here!
However, the premium version is longer and more resources and examples are provided.

Beans, beans, BEANS!  I’m continuing my lessons with Proko’s Figure Drawing Fundamentals class with the lesson on simplifying the motion of the torso.  When I first saw this exercise, I kind of laughed to myself.  What could a bean tell us about the torso?  Wasn’t this too simple?

I wasn’t saying that later when I was about 70 beans in and I realized that there was so much more information being transmitted in this exercise than I realized.  When a torso bends and twists, creases and tension are expressed in various ways.  This is such a subtle lesson in physics that can really bring volume to your figure drawings!  Here’s an example with a current work-in-progress of mine.

nariko-redesign-wip-3

The first pose is very straight forward and also very stiff, while the second pose pushes the dynamism a bit more, but still seems so stiff.  I employed the ‘bean’ method in the 3rd pose to try and capture the subtle twist and lean of the torso combined with the foreshortening of the lower camera angle.  Already, the pose is looking much better and has more weight to it than the others, which didn’t quite pay respect to the physics of the torso.

And now the beans! Here’s a sketch dump of all of the ones I sketched for this lesson.  I’ve been doing the recommended 100 sketches before moving on from a lesson.

The biggest challenge for me was figuring out how the creases turn when a torso is twisting.  I have no advice on this issue except to practice and observe!  Foreshortening, torsion, and eye level play a big part in what overlaps what and I am only scratching the surface of this concept, even after drawing this many beans.

I also believe that learning something so subtle as this requires practicing and drawing, rather than reading advice about doing it.  It just kind of clicks in your brain when practicing, which is why I think in this case drawing numerous sketches like Proko recommends to be very useful (and essential)!

I’m definitely excited to move on to the Robo Bean, which is the next step up in complexity from this base form in a later lesson.

Of course, I couldn’t help having a little fun by the end of this assignment illustrating random bean puns.  A cookie for you if you can guess which ones they are!

Previous Lesson:  Gesture
Next Lesson: Structure Basics (coming Soon!)

What I Learned from Master Copying – Offering to Venus

I recently finished a master copy of John William Godward’s painting, Offering to Venus.  This was my first ever attempt at copying a masterwork and it’s proven to be a most enlightening experience!  Many thanks to Sam Hogg for her suggestion to try this exercise and her tutorials on the matter.

See a step by step with detailed notes at WiPnation.

Why Do This?

Why would someone drive themselves insane this way, you ask?  For me, I did this exercise to prime myself for another painting which I had hit a dead end with.  I wanted skin glow, gorgeous roses, a classical painterly feel, and translucent material, but it all seemed flat and plastic no matter what I did with it.  I needed some time away from the piece to figure out how this was done.

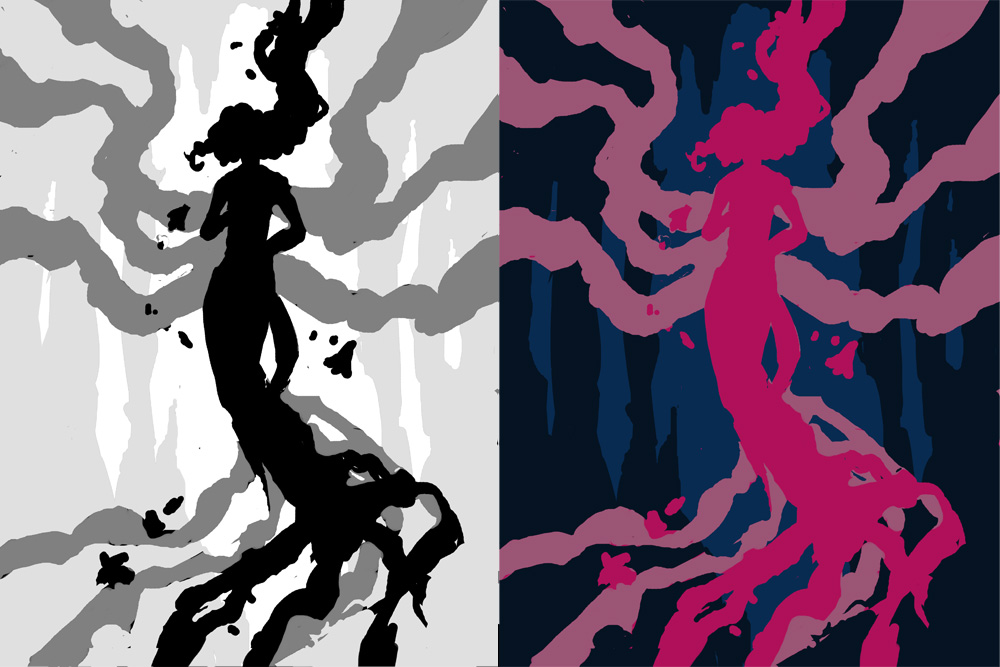
The ‘other’ painting, a reinterpretation of the cover of
Kushiel’s Dart by Jacqueline Carey.

That’s when I came upon John William Godward’s Offering to Venus.  This painting had everything I wanted in my own – glowing soft skin, roses, sheer cloth, and a classical feel.

How Did I Do This?

In order to get the most out of this exercise, I followed Sam’s established rules:


1. NO tracing!
Hone my artist’s eye for proportions by using a grid.  Using this method also forced me to pay attention to the volume of objects in the image, rather than simply tracing the lines in a mechanical fashion.  I set the grid up using Guides in Photoshop.

2. NO color fills!
Paint in the gradient of the first layer with brush strokes instead. Color fills just make the image look mechanical and plastic if you paint because the gradient is too perfect.

3. NO color picker!

Learn to eyeball color instead of using the color picker to pick them from the original. This is to force me how to guess how it was mixed and be mindful of layering, as it’s important to digital as well as traditional painting.


What Did I Learn?

Copying is NOT the Point! – I could have copied each and every detail, but that wasn’t the point of this assignment and would take far longer than a practice exercise should. I went in with the mindset of expecting to learn specific skills and make specific observations.  Doing this beforehand gave me some goals to meet, other than ‘drive myself crazy with copying things down to the brushstroke’.
Know When to Find Edges – Achieving a soft, painterly feel in a piece is all a matter of losing edges.  Having solid lines throughout only flattens the image instead of giving a sense of light bouncing off surfaces.  By the same token, there are key outlines around the bottom of the nose, the toes, where cast shadows are deepest in the folds of the cloth to show where fabric overlaps and many other areas.  
Outlining in key places can really pop those soft edges, by contrast!  Losing detail also helps bring the viewer’s eye where the painter wants it as well as create a depth of field for a more immersive quality.  The roses are a perfect example of this. Notice how the roses around the edges of the grouping in the vase are barely more than blobs with a few key brushstrokes to intimate petals while the ones in the middle of the vase (closer to the viewer) are in more sharp detail.
Color Circulation – I noticed a method the artist used to tie the model to the background and make the whole image feel cohesive was to repeat colors around the image.  Her hair is the same hue as the terra cotta red of the background statue which is also repeated in various veins and coloration of the marble.  The pink and reds of the dress are repeated in the roses.  The blue of the background marble repeats again in the ribbons and sleeve seems of her dress and the bounced light of the sheer cloth as well as a spot of blue marble towards the bottom of the piece.  It’s all so perfectly balanced and you don’t really understand that till you’re looking at it up close like this.

Delicate Features – I have a bad habit of making eyes and chins of my characters very sharp and harsh.  Feminine edges are hard for me, which made her face a particular challenge!  Almost all the planes of her face are lost to soft transitions relying on highlighting and the inset of the lips and eyes to orient the viewer.  The eyelashes, for example, are softened by shadow, which gives her a much more realistic and delicate appeal than if I’d given her harsh, mascara-laden eyelashes and super defined lips as I usually do for my characters.
Do Not Fear the Darkness! – For as soft and glowing as everything seems, this painting has a deceiving level of near-black shadows in it, all of which are in the dark brown range.  I realize I almost never use near-black in my paintings and this was a great exercise to force me to do so.
Mark-Making isn’t Just for Traditional Painters – Zooming in close on the original image revealed so many value transitions that are not just smooth gradients.  The cloth of her dress, marble, and sheer robes, for example, were very hard for me to replicate because while the overall forms and texture are smooth, the highlights have a subtle dappling that give these items a vaguely textured feel.  
Directional mark-making by hatching my color transitions instead of blending them with a huge translucent brush helped to bring back that painterly feel that digital is naturally disinclined to.  It’s so easy to try to get EVERY pixel perfect when that painterliness factors in due to the mistakes and imperfections of a brush.
Skin and Light – It’s so easy to just paint in the flat colors, blend them, and call it done with digital, only to discover you’ve made a muddy plasticine mess!  This happened to me with the skin, at first, till I realized that by laying the vibrant oranges and pinks down initially, then layering base tones and white highlights on top that I could preserve that glowing luminosity that makes Godward’s works shine.  I feel I should have known this, as a watercolor artist, considering laying in the skin blush is what I usually did first.  Digital painting shares a lot more with traditional painting techniques than I had originally thought! 
All in all, this has been a great exercise for me. I hope you all will try it out for yourselves and tell me what you learn!
Finally, here is an animated gif of my copy’s progression!
And a video link for those who can’t see the GIF properly:

The Portfolio Regeneration Project

The main character from
Kushiel’s Dart.

Since Dragon*Con, it’s been a week of cleaning, catching up on work, and riding the tide of inspiration that always comes after taking part of such a large art show full of inspiring people.  The portfolio reviews I received there have my brain in overdrive when it comes to thinking of ways I can get my portfolio up to snuff.  I needed newer work and more of it.  I needed more examples of illustration, book covers, and the kind of work I’d like to do for CCG.

While I have CCG covered by using my own in-progress fantasy novel for inspiration, generating art for the rest didn’t seem as straightforward.  That’s when it hit me.  If I am seeking to do art for fantasy novels, why don’t I do what I’m doing with the fake Magic the Gathering cards and do the same with a novel?  Since my own novel is largely incomplete, I’ve decided to take one of my favorite novels on instead – Kushiel’s Dart by Jacqueline Carey.

With fallen angels, a rich tapestry of unique mythology, masquerade balls, and intricate tattoos, there’re plenty of visuals for me to play with in this novel that are right up my alley!  The plan to generate more portfolio pieces is to re-read this wonderful book and create my own versions of illustrations of my favorite scenes, as well as any character art that comes to mind.  This may include my tries at creating concept art sheets for that career wish of mine to get into concept art for games later on in life once my work is ready.

Finally, after I’ve absorbed the whole book and its themes, I plan to do my own version of the cover art for it.  If all goes well, I will be doing this art generation project with more than one from the Kushiel’s Legacy series, or perhaps other fantasy favorites of mine!

Working from a book which, to date, has no movie adaptation makes it far easier for me to create my own raw original versions without a visual influence.  It also gives me the freedom without the copyright worries, since copyrights for books only cover the text, and not any visual representations.  Even so, I don’t plan to sell whatever art comes from this project without Jacqueline’s blessing first.  It’s main purpose is to freshen up my portfolio and not my own pockets.

The plan is to post sketch collections from this project on this blog, but for those of you who want to keep up with every step and sketch of the Kushiel’s Legacy themed work from this project, you can follow the Kushiel art blog here or its Tumblr counterpart here, which will echo the posts on the Blogger version.  The Kushiel art blog is empty right now, but it won’t be for long!

The old iPad I inherited from my dad has proven an invaluable tool for this ambitious project, as I can add searchable notes to my ebook version of the novel and highlight pages which have physical description for illustration purposes.  The pages are marked, the blank sketchbooks have been acquired, and my drawing fingers are itching!  Let the regeneration of my portfolio begin!

What is your dream illustration project?  What novel would you love to do work for?  Finally, what novel would you love to see me illustrate?  Discuss in comments!

Eureka Moment – Composition

eu·re·ka [yoo-ree-kuh, yuh-]
( initial capital letter ) I have found (it): the reputed exclamation of Archimedes when, after long study, he discovered a method of detecting the amount of alloy mixed with the gold in the crown of the king of Syracuse.


What is a ‘Eureka Moment’?
It’s that moment when you’re trying to understand a complex concept where a particular bit of information is presented that suddenly makes all of the elements you didn’t understand before click together to make sense.


We all learn in different ways.  There’s nothing like returning to my fundamental studies in anatomy in the past month to really drive this point home.  You can explain to me a billion times about the pelvic furrow or the angle of a joint’s rotation, but I am a very visual kinesthetic learner, meaning I have to learn by doing, which means things often don’t make sense to me till after I perform many learning exercises to explore a concept.

My latest ‘Eureka Moment’ occurred while reading issue #80 of ImagineFX magazine. Many of you may think this magazine is only for digital artists, but they cover plenty of topics and offer many tools that would be useful to all artists, such as articles on color theory, features of classical illustrators, and reference photo collections on the accompanying CD.

It was one such article on analyzing composition by Dan Dos Santos that led to my recent ‘moment’.  Considering Dos Santos’ track record of gorgeous book covers featuring one or two characters, I knew he would have plenty to say on the matter! It’s tough to make a book cover really pop with just one character to work with. You have to catch the reader’s interest, visually and story-wise.  A single image has to have enough punch to make you want to learn more!

The article covers, among other things, a simple exercise you can do to break down your composition involving greyscale layers to indicate foreground, middleground, and background.  I thought I’d try it on my latest piece, Persephone Queen of the Underworld:


The Results:
Converting the image to simple shapes allowed me to get a better sense of how it was reading visually.  I discovered by doing this that while there is a nice vertical spiral throughout the composition, the bottom where her dress trails off is just a tad too busy and cuts off abruptly.  The dress ‘tendrils’ on the left side flowing out from her back also create an awkward silhouette that is disharmonious with the shapes created by the adjacent ‘tendrils’.

I also found that the relatively flat background is not creating enough narrative or visual interest in this piece.  Visually, it falls flat of framing the figure and gives us no information about her setting or story.  I asked myself ‘How many people would know this is Persephone or some kind of underworld figure if I hadn’t said so in the title?”  Originally, I wanted to keep this area simple because the flowers, swirls, and figure would be made too busy by anything more complicated than a void, but now that I ask myself the tough questions, it’s just not telling enough of her story!

Next, I tweaked with the layers of the background planes to see what I could do to create more harmony and visual interest.  I then broke down the main planes into color groups, per Dos Santos’ suggestion to keep your color groups simple to create high contrast and visual interest:

The Results:
I found that by pushing the figure upwards, I could give the flow of her dress more room to terminate in a less abrupt way, which makes a more comfortable vertical flow for the viewer’s eye through her hair, down into the core of the figure, and down through the dress.  She also has a delightful ‘tree’ shape to her now that fits well with her vegetation theme.

The energy swirl was removed, leaving the flowers to do the work of creating the spiral of energy around her, which I feel also works better to help solidify her symbolic connection to the blossoming of spring.  The background plane was tightened up from a random void of energy to the mouth of a cave with rock formations which frame the figure and tell something of her current imprisonment in the Underworld.

Now, I’m preparing myself to dive back into this piece and really make her shine!  Elements of the piece may still change in the doing, but I feel I have a much stronger idea after I’ve spent days staring at this painting and not knowing what exactly felt wrong about it.

I hope my Eureka Moment helps someone out there! If you’d like to read more on the topic of planning compositions, I highly recommend getting Issue #80 of Imagine FX and reading Dos Santos’ original article for more working examples and invaluable advice.  There are more great articles included that helped me get inspired, including the brilliant compositions of Howard Pyle.

What was your latest ‘Eureka Moment’?  Share in comments!

Studies for April 2012

I spoke of studies in a previous entry and now here they are!  April was a very productive month to get off my bum and really make good on all those promises I’ve made to myself to get better at anatomy by drawing and drawing until I can draw no more.  I’ve realized if I want to get to the point of making a living at what I’m doing, I’m going to have to get better and keep up the push!

This month’s studies were accomplished through a number of life drawing sessions I attended live or using the Pixelovely tool when I didn’t have the time to leave the house.  Pixelovely draws from a wonderful pool of well-lit stock photos and lets you choose the state of undress and gender of your models, as well as how long you want a session to be (with automated breaks!). I highly recommended it if you don’t have access to live models.

These are just some of the studies. Had to leave some out for post length sake.
Studies ranging between 30 seconds and
5 minutes. View high-res version.
Studies ranging from 11 to 20 minutes.
View high-res version.
Various studies from a live session at Bohemian Circus Night. at the
Apache here in Atlanta.


What did I learn?
Mainly, I’m learning to loosen up and not be so obsessed with detail.  Sketching mainly in pen without the ability to erase or with a brush pen allowed me to focus on shadows and forms instead of getting caught up in all the technical side of things.  I find if we get caught up in details, we miss the energy of the model and what makes a pose interesting in the first place (something that would serve me well in depicting characters, I think!).

I learned a lot about the trouble areas of the face, such as the juncture of the nose and lips and how light falls there (especially in the Bohemian Circus Night sketches).  Reflected light from the floor and one’s own skin also caught my eye this month.  I noticed also the most successful studies are the ones that paid attention to peak highlights, or where the light is strongest on the elements which protrude outwards (elbows, tips of noses, etc) while highlights are more soft shifts across smoother areas, like cheeks, foreheads, and the subtle muscles of the back.

Next Month’s Challenge to Myself:
Tackling hands, feet, man-crotches, and facial expressions.  Basically getting into those very specific areas of anatomy trouble for me. Going to try and do 100 sketches of each!

It’s funny how we pick up little tidbits of knowledge from staring at the same figure in a different situation or from a different angle. Some things just ‘click’, but you’ll never get that click unless you’re always looking at the same thing and thinking about how it works constantly because the human form is just so complex.  I’ve had life drawing classes in the past, but that knowledge tends to fade if you aren’t practicing all the time.  Here’s hoping keeping the knowledge fresh will link up to all of the other art I’m making right now! I trust it will in that way that knowledge sticks in the back of your mind informing you in ways you aren’t even aware of.

So what are you all working on?  How are you challenging yourselves and keeping your art form going strong?  Share in comments!

My Anatomy Improvement Wishlist

In an effort to improve problem areas of anatomy, I present to you My Anatomy Improvement Wishlist, or exercises I intend to do involving the following:

  • Hands – I still have problems with fingers at foreshortened angles and the joint of the thumb to hand/wrist.
  • Feet – Less troublesome than hands, but still alien to me in their funkiness.
  • Faces – Specifically various facial expressions and different facial types.  To help me draw people who look diverse instead of like myself. Also concentrating on the planes of the face for better understanding of how varying light defines facial features.
  • Arms – Mostly the construction of the bicep/tricep area. The way these muscles interact baffles me.
  • Man crotches – Don’t laugh!  The way pants and clothing drape over this…complex…area of anatomy always looks too tight or just plain flat and weird the way I draw it currently.
  • Man Waists – To help battle my bad habit of drawing men with feminine waists.

How will I fight these difficult areas of anatomy?  With practice…and chocolate (and coffee)!  I’d like to do the 100 drawings of each exercise and will probably shift my studies of life drawing towards planar breakdowns and contour exercises instead of the usual gesture and shaded drawings I’ve been doing with the Pixelovely tool.  They say you have to draw something, 10,000 times to know it completely by memory. I think I’ll just try 100, for starters.

Once this month is up, I’ll probably dump the best picks from my studies here for you all to see.  In the meanwhile, what areas of anatomy do you all have problems with?  How do you plan on combating your problem anatomy areas?

Stay creative!