Just a visual reminder that you can get 15% off at my shop till the end of the month with code DRAGONCON. I have a lot of extra goodies, like playmats, dice bags, and more, so help me make some room in my little studio!

Just a visual reminder that you can get 15% off at my shop till the end of the month with code DRAGONCON. I have a lot of extra goodies, like playmats, dice bags, and more, so help me make some room in my little studio!
I’m back from DragonCon and have a massive head cold as a souvenir! Before I disappear with hot tea and meds, I thought I’d post about how my DragonCon went.
This year was an odd duck for me. I had no table, which is the first time I’ve been without one for a couple of years. I was completely okay with that, however, because it meant that I got to actually experience the con by attending interesting panels, costume watching, and networking with people rather than being tied to one place.
I went to a wide range of panels, from the history of Persian dance to indie game development (panel notes forthcoming). I somehow never made it by the dealer’s room since venturing anywhere outside of the Hyatt just seemed like too much effort. The Hilton for the game dev track was as far as I made it.
I also ran two panels for other artists entitled Social Media for Artists 101 and 102! Any event where I can play Duck Army as an ice breaker is a good event. The attendees at my panel were all very enthusiastic and willing to share resources. Thanks for making it a great first run for 102, everyone! (NOTE: You can find the PowerPoint files of my presentations here.)
ART SHOW
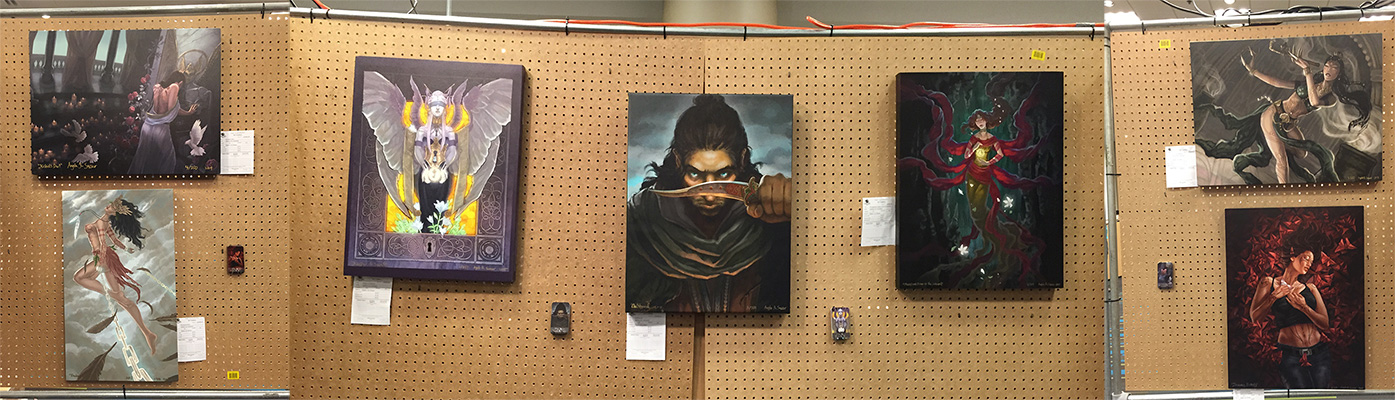
John, Anne, Heidi, and the other staff ran a tight ship, as always! It was an experimental year for me in that I left my masks and Art Nouveau work at home and only displayed my digital fantasy work in the show this year, an intimidating decision! I was happily surprised that two of my canvas prints (Oathbound and Kushiel’s Dart) found new homes! I did decently in the print shop, though I have a few extra playmats and dice bags still available if anyone’s after them. Use code DRAGONCON to get 15% off at my shop right now!
FAVORITE MOMENT:
We walked by a guy in the skybridge dressed as a herald from Assassin’s Creed. He was putting up posters on the walls every few feet. I heard tales of cosplayers dressed as Assassins zipping by and tearing them down later. When we asked him how many posters he had, he said 250. I am highly amused by this kind of clever fun. I didn’t get a picture of him, but I got one of his poster, which was really well done!
BEST COSTUME:
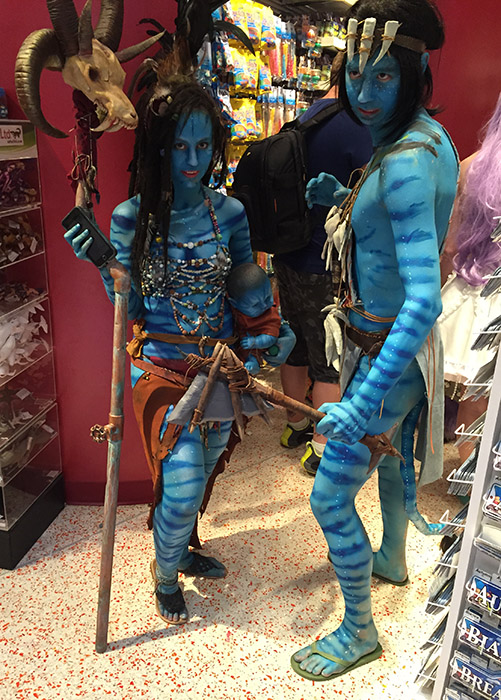
I snapped a pic of this amazing pair dressed as Na’vi from
Avatar during the Night at the Aquarium. That baby looked so very real. It was quite creepy (and awesome)! It’s the dedication to full body paint and detail that made this the best costume I saw all con. While the Night at the Aquarium was great for costumes, they had all of the lights turned off in the displays this year, which made it really hard to see any fish. How I wish I’d gone to the philharmonic concert instead.
WHAT DID I LEARN?
I always like to think about what I can learn from looking at the displays and presentations of artists, but this year’s revelation was on a deeper level. Instead, I got a lesson in creativity and motivation from attending the panels on creativity and writing this year.
The advice from a lot of the authors there was that comparing yourselves to others was the quickest way to burn out. Most of us in the creative industry are just trying to get by and/or create something that we love. You can partially measure that success by money, but other times, it’s the victory of just having made the thing since, more than likely, creating art is not really going to pay all the bills until a very long time out. Most of us are in that dreaded ‘gap’ and those who would be at the top are not always guaranteed to stay that way. Focus on making good art and stop comparing yourself to others.
And that’s a wrap! You can see more of my DragonCon photos of some of the cool swag I picked up in Artist Alley and other moments over at my Instagram. Till next time!
Watch a quick intro of the new series of paintings and masks I’ve recently launched here on Patreon! You can already make your Pledges today over at the Ladies of the Months Patreon Page if you’d like to get in on Lady of January themed Rewards.
Remember to check my Rewards comparison infographic to see what the difference is between pledging here on my main Art account as opposed to on the series page, instead.
More soon!
EDIT: I’ve updated the Casual Mentorship after some feedback. Now with more bang for your buck! Also added a more in-depth explanation of exactly what the Portfolio Review and Art Marketing sessions would involve.
Last year, I tentatively opened up the Creative Consulting section of my website. Now, I’m excited to roll out Mentorship slots via my Patreon reward tiers! I’ve had a few requests from other artists who wanted to have a deeper educational experience than my painting critiques, which I offer via redlines and paint overs. I’m currently offering two types of mentorships:
The Casual Mentorship
You will receive:
The Full Mentorship
You will receive:
EDIT: What are the Portfolio Review and Art Marketing Sessions?
The Portfolio Review and Art Marketing sessions would be hour long online chats that we have together via Hangouts or Skype to discuss your needs during the mentorship. The Portfolio Review would focus on your art and any concerns you have related to your work and techniques while the Art Marketing session would be mainly focused on your business and marketing efforts.
If there happens to be time left after we’ve discussed the primary topic, we can always talk about other things, but I like to keep the sessions focused on a primary concern so as not to overwhelm us with information.
Extra, Extras!
In addition to the mentorship perks, you’ll receive a slew of other goodies I’m offering via Patreon that come with my Mentorship reward tiers, including wallpapers of my art, monthly tutorial videos, and more! See the Rewards section of my Patreon page for the full details on what other rewards are included.
I’m only offering a limited number of slots right now so I can make sure that each student will have the dedicated attention they deserve, but this may change in the future, should this venture prove successful! For those who might be new to my work and would like to know more about my credentials, you can read more about my experience here.
Have any questions or comments? Feel free to comment on this journal or email me!
I’ve been working on tons of exciting things this week for my IP Development Mentorship with Anthony Jones and Dan LuVisi!
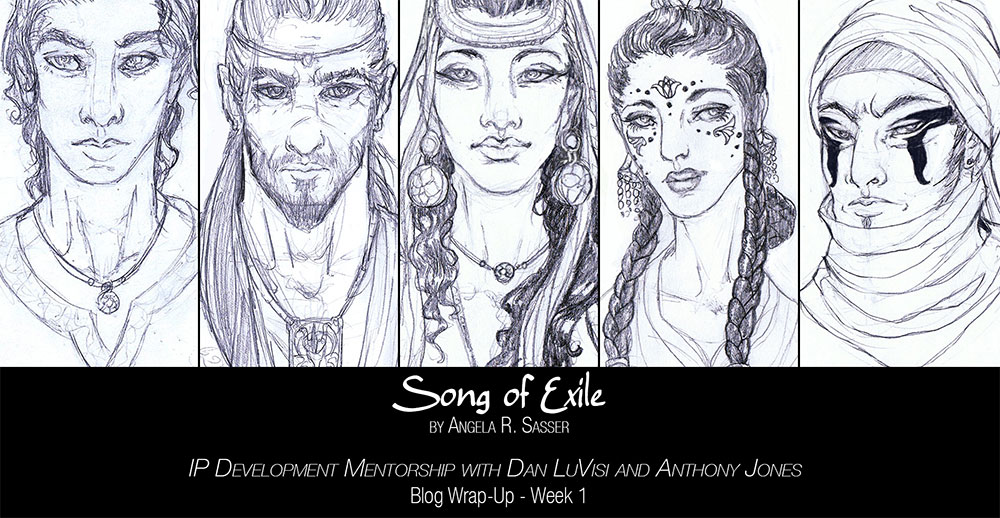
You can get a more in-depth peek at my world-building experience, thoughts about the mentorship process, plus sneak peeks of my personal project’s art by supporting me at any level on Patreon!
I’ll be uploading weekly blog posts of my progress *exclusively* for my Patrons there.
And now, SLEEP! This first week has been exhausting, but amazingly productive!
Once you become my Patron, you can login to start reading the first blog post in my mentorship diary here:
https://www.patreon.com/
The recording of last night’s Hangout is up! You can watch the video here:https://youtu.be/G3EtwryBqLk
Here is a summary of the topics and links:
TOPICS this Hangout:
– Medical issues, motivation, and art.- Female character redesigns.
– NEW Etsy shop!
– Women in Fantasy Illustration Facebook Group- Graphic Artists Online
QUESTIONS answered:
– How long does it take you to paint an angel?
– How do you study?
LINKS from this Hangout:
My New Etsy shop – http://angelasasserart.etsy.com
Proko’s Life Drawing – http://www.youtube.com/user/prokotv
Pixelovely Life Drawing Tool – http://artists.pixelovely.com
My Book Reviews and Resources hub – http://themuseslibrary.blogspot.com ImagineFX Magazine – http://www.creativebloq.com/imaginefx
And finally, as for the giveaway winner for this quarter, I’ve decided as long as I have only two eligible winners, I’m going to switch back and forth between them until there’s more competition. So that means Caitlan is my winner! If nobody else is donating at the $10 tier during the next giveaway, Vanessa will automatically be my next winner (and so on and so forth).
So let me know what you’d like, Cait! You have a choice of a sketch based on a two keyword prompt OR a 50% off coupon at any of my online shops, both art and artisan.See you guys next time and thanks, as ever, for your support! As long as I have Patrons here, these monthly Hangouts will continue.:)
Hey guys! I’ve decided to write this month’s update instead of broadcast it because I’m feeling a bit under the weather (food poisoning, urgh!). So rather than subject you all to my sick mug, I thought I’d write March’s update instead!
It’s been great! I’ve been whirling between my studies with Painting Drama and Proko’s Figure Drawing Fundamentals. Here are some of the studies I’ve been working on!
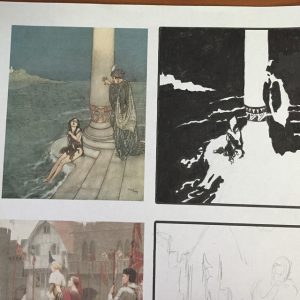
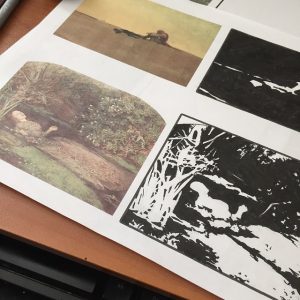
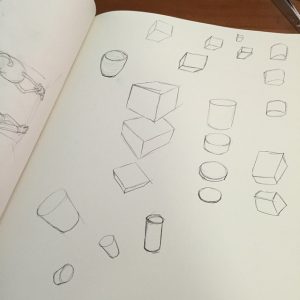
I’m slowly, but surely working my way up to 25 abstractions for my assignment. They take quite awhile so it has been a slow going process, but I’m learning so much about how compositions are arranged! The 3D object assignment is building me up for drawing volumetric mannequins, which I’m very much looking forward to.
I’ve also been working on finishing the Rapunzel comic since it’s going to be published in an anthology later this year (more on that later as publication draws closer). Now with more detail than ever before since I have a longer time to focus on them!

And finally, saving the BIGGEST announcement for last. I’ve put a downpayment on entering a mentorship with Dan Luvisi (of Last Man Standing fame) and Anthony Jones (of Robotpencil.org and Blizzard Entertainment fame) in May and June! This mentorship is going to focus on IP development and I’ll be using my own novel as the IP I intend to develop for this mentorship!
You can read the syllabus here (starts on page 15).
It’s no small investment, but I’m using the pennies we’ve been pinching for SmartSchool to give it a shot. I was a little torn, but the fact is, I’ve always felt like more of a writer-artist than purely an artist and this mentorship allows me to give both of those passions the attention they deserve. Plus, there is always next year for SmartSchool, if my pinched pennies can regenerate by then.
By the end of this mentorship, I hope to have the first two chapters written, illustrations of characters and key scenes, a perfected pitch and SO much more! We’ll be able to talk to knowledgeable parties about their experiences in this field and receive guided instruction.
The instructors are even hoping to bring student work to San Diego Comic Con to pitch what they can to any interested parties. They obviously can’t guarantee success, but the slim chance to be seen by the right people when I’m at that point definitely can’t hurt!
This could be HUGE, guys!
I am so excited (and a little intimidated) by what this could mean for my future! And of course, I’ll be sharing some of my exclusive ‘behind the scenes’ work related to my novel during this intense project with my fine Patrons over at my Patreon because you guys have been amazing. Thanks for your constant support and encouragement!
I did have a question I wanted to answer about study sources for this month’s update, but it really deserves it’s own blog post. So, for now, I’m going to go sleep. I have too much to do for a stomach bug to defeat me now!
See you next month where we’ll hopefully be back to a broadcast format!
Now that Nariko’s design is figured out, it’s on to coloring! I decided to try a new coloring technique called the Ambient Occlusion method. This technique is a way to bring a structural quality to your images relatively quickly. I used Alex Negrea’s tutorial and also this helpful process post from David Lojaya.
Here’s a breakdown of the main layers in my painting.
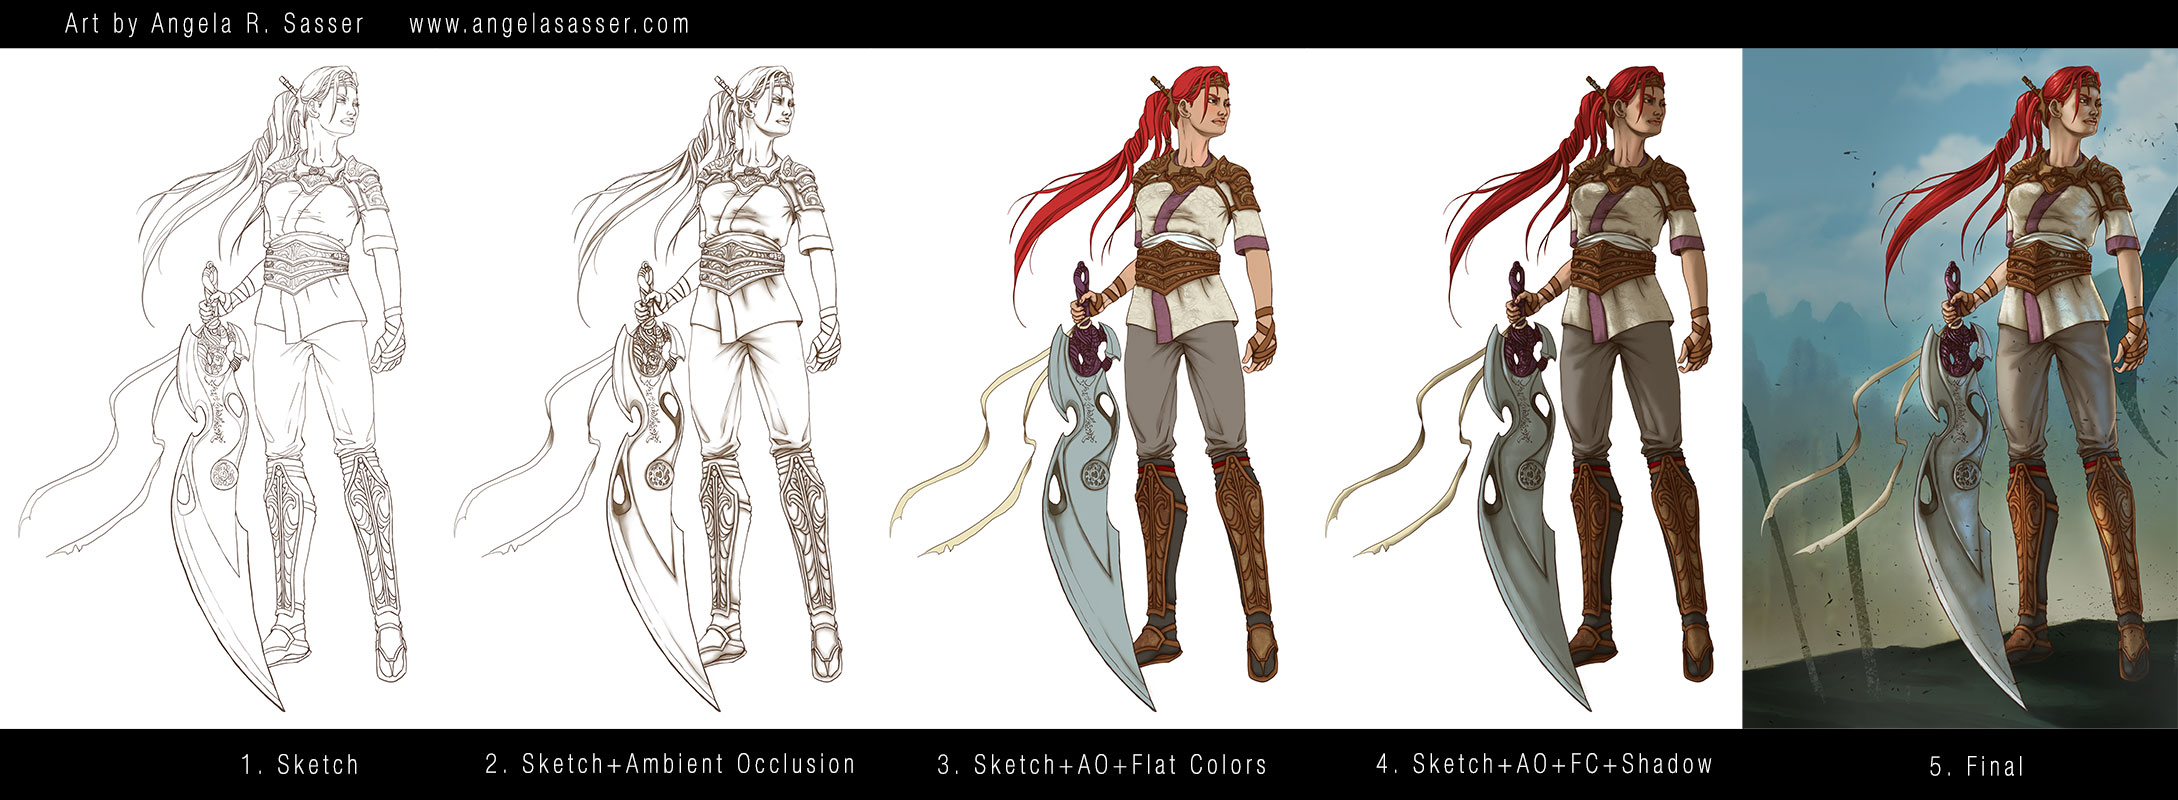
NOTE: My Patreon Patrons at the $5+ reward tier have exclusive access to my .psd file, so be sure to pitch in there if you’d like to peruse my layer structure!
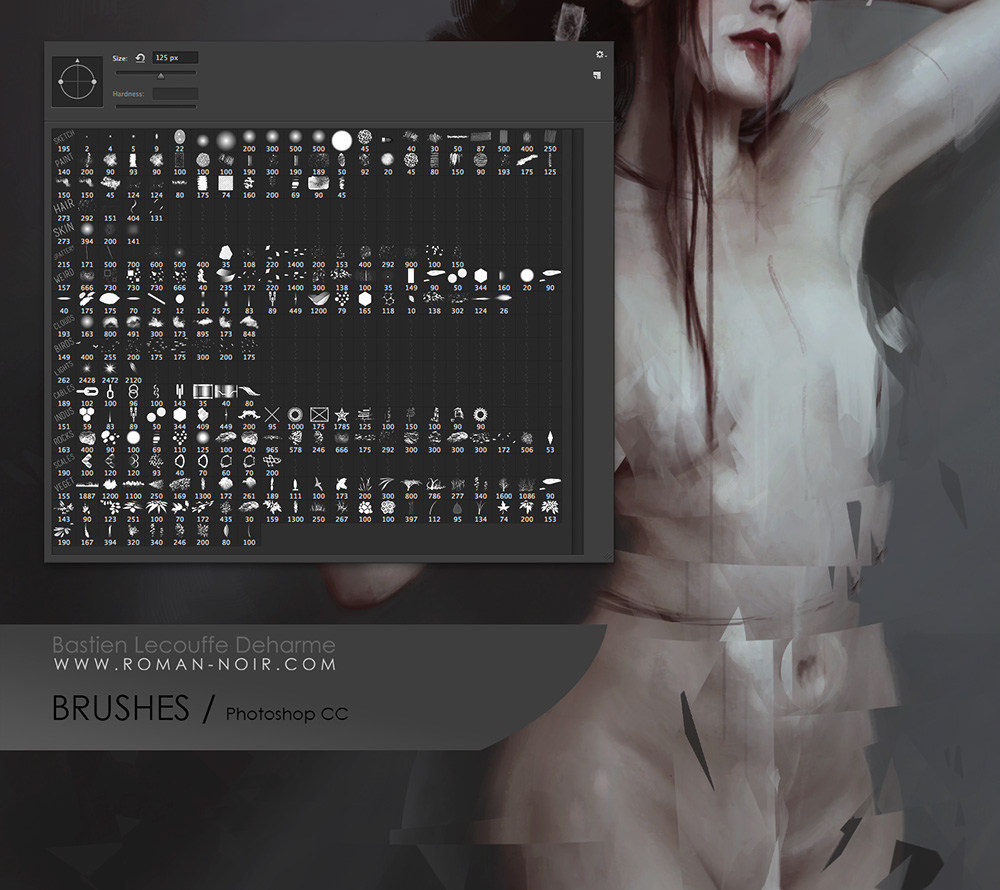
Deharme’s Brush set for Photoshop CC
Finally, here’s an animated GIF of my process (roughly 8 mb).
If you’d like to download wallpapers of the final image, I’ve provided the 1920×1080 size for free.
Also be sure to check out the article this image is featured in, What Women Want…In Women Characters for an interesting discussion of female character designs and representation.

Other sizes plus the .psd are available exclusively for my Patreon Patrons.
PRINTS AND PRODUCTS – Contact me privately if interested.
I was challenged by an online art group I’m in to redesign a female character. This idea really appealed to me as a gamer and comic book fan, considering the amount of times as a female fan I’ve seen a character and found myself highly disappointed by the bland or over-sexualized design that detracted from the amazing female character at the core. Some of my candidates were my heroines growing up, from She-Ra to Psylocke!
Eventually, I decided on Nariko of Heavenly Sword. Here was a tough, driven woman who chose to sacrifice herself to an ancient sword in order to defend her people, the same people who had viewed her as a cursed outcast.
But that outfit! I could barely take her seriously doing all of the amazing brutal fighting she does in such impractical gear, even given this was a fantasy setting.
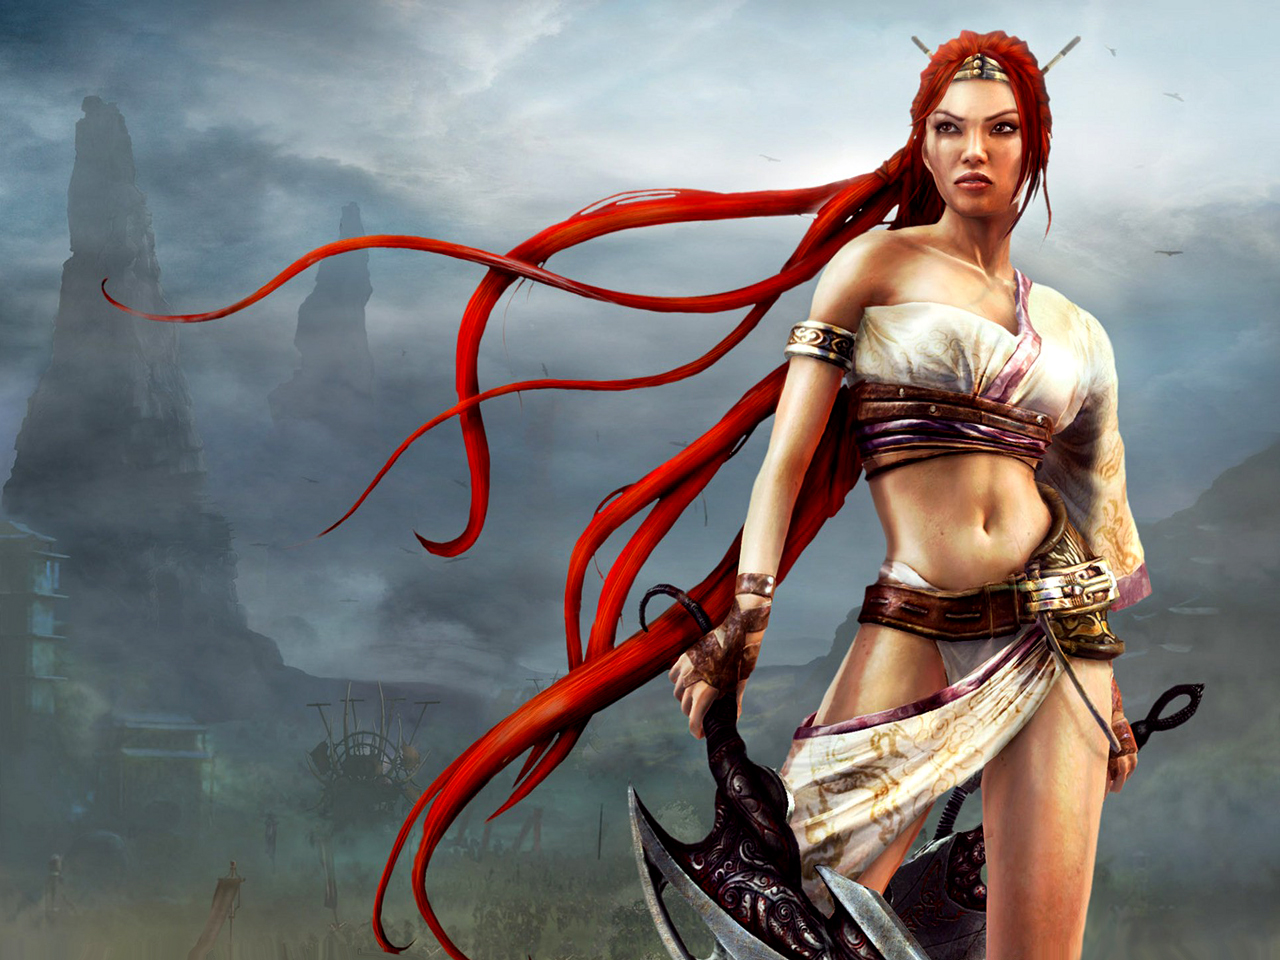
And so my redesign began first with studying the designs of the other characters in the game. A fusion of European and Asian aesthetic pervades the armor designs of Heavenly Sword. I kept a massive private Pinterest board for this purpose.

I used a pre-printed fashion croquis sketchbook to knock out some quick costumes in ink and Copic marker for Nariko’s re-design. My thought process was to simply dress Nariko more closely in the fashion of her father, who was dressed in a kimono style top and pants covered with armor in key places. This look seemed appropriate considering the fact it was snowing and everyone else but Nariko was dressed appropriately for the climate and for the ensuing large scale battle.
I also found it baffling that while Nariko was trained to fight that she wasn’t at least wearing basic armor, even if she were not to be on the front lines or was intended to be more of a Gladiator type of fighter.
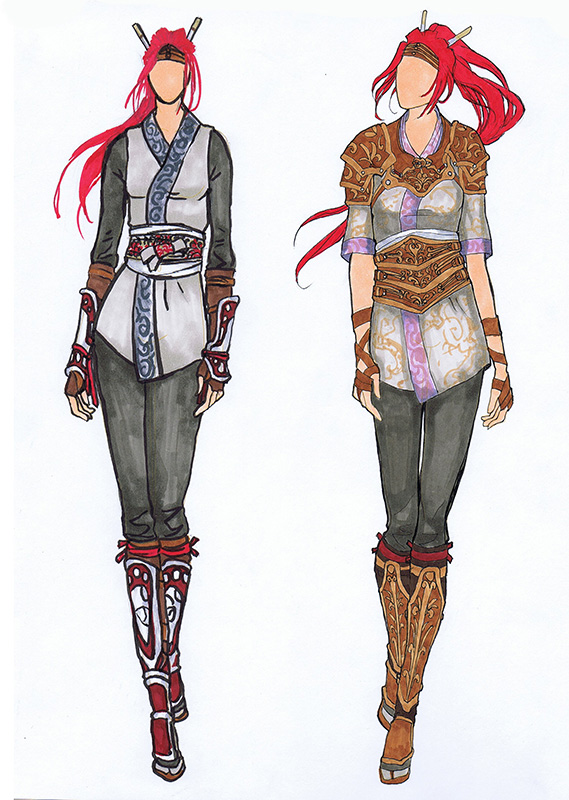
I chose the design on the right because I liked the way that it was both protective, channels the Gladiator-esque look of her original design with the tooled leather, and maintains the archetypal colors and shapes we’re used to for Nariko. The one on the left had too much crimson in it, which was too closely associated with her father and also doesn’t allow her hair to be the most red and striking part of her design, as I feel it was meant to be.
Next, I did quick gesture sketches in an attempt to capture a pose that felt heroic, but would also show off this new armor design. It was a tough decision, but I eventually settled on pose 3.
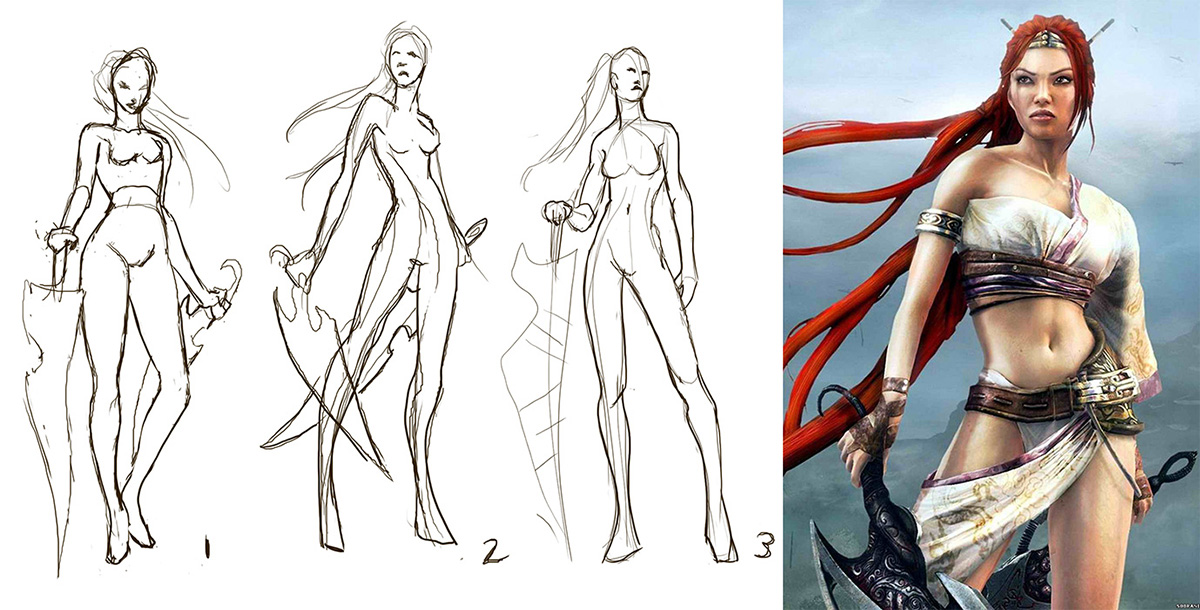
And yet, still 3 was not enough! I needed to push the heroic nature of the pose. She was still too straight on and seemingly staring off into the distance without much interest. Moving the camera level downwards so that we’re looking up at Nariko gives her so much more presence! The pose also feels more dynamic.
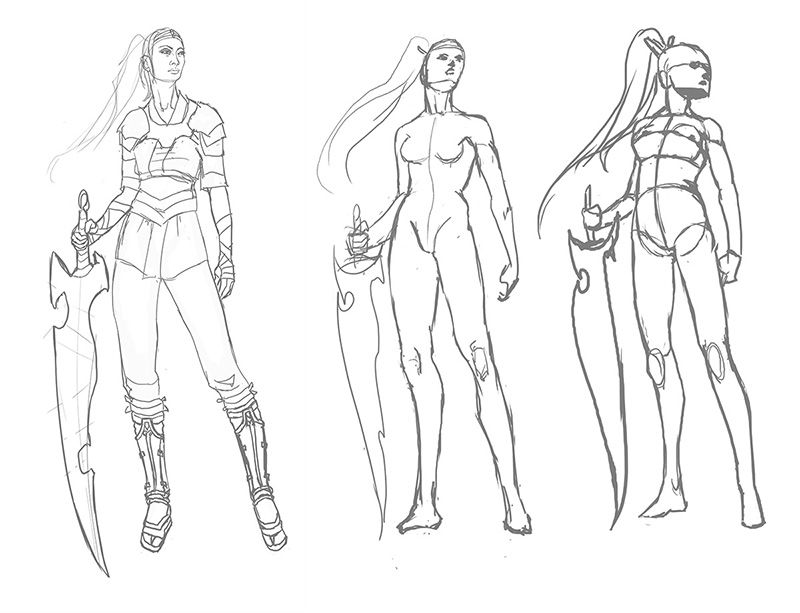
I have my hero. She has her armor. Now, it’s time to paint!
You can watch the free version of this lesson here!
However, the premium version is longer and more resources and examples are provided.
Beans, beans, BEANS! I’m continuing my lessons with Proko’s Figure Drawing Fundamentals class with the lesson on simplifying the motion of the torso. When I first saw this exercise, I kind of laughed to myself. What could a bean tell us about the torso? Wasn’t this too simple?
I wasn’t saying that later when I was about 70 beans in and I realized that there was so much more information being transmitted in this exercise than I realized. When a torso bends and twists, creases and tension are expressed in various ways. This is such a subtle lesson in physics that can really bring volume to your figure drawings! Here’s an example with a current work-in-progress of mine.
The first pose is very straight forward and also very stiff, while the second pose pushes the dynamism a bit more, but still seems so stiff. I employed the ‘bean’ method in the 3rd pose to try and capture the subtle twist and lean of the torso combined with the foreshortening of the lower camera angle. Already, the pose is looking much better and has more weight to it than the others, which didn’t quite pay respect to the physics of the torso.
And now the beans! Here’s a sketch dump of all of the ones I sketched for this lesson. I’ve been doing the recommended 100 sketches before moving on from a lesson.
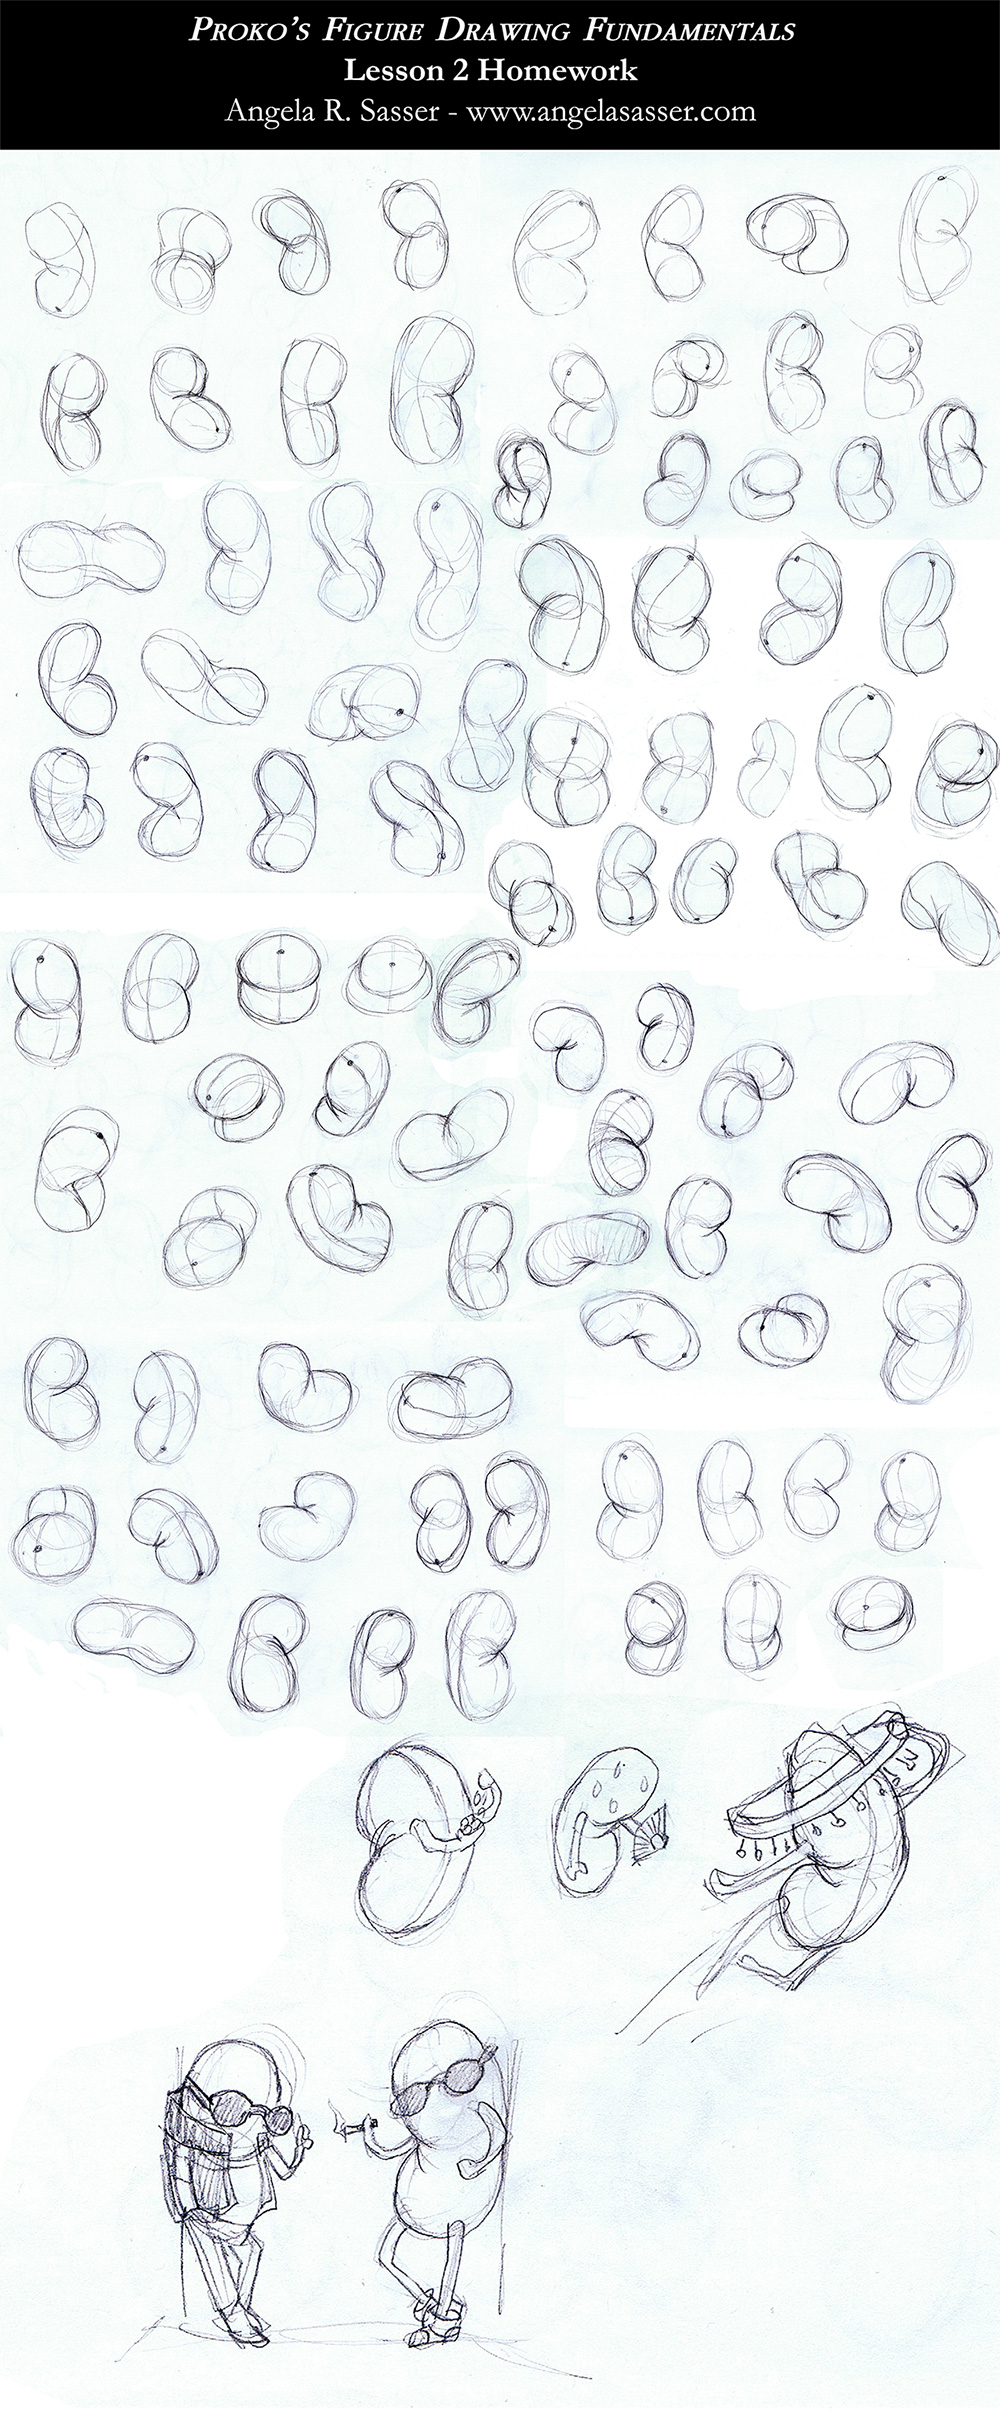
The biggest challenge for me was figuring out how the creases turn when a torso is twisting. I have no advice on this issue except to practice and observe! Foreshortening, torsion, and eye level play a big part in what overlaps what and I am only scratching the surface of this concept, even after drawing this many beans.
I also believe that learning something so subtle as this requires practicing and drawing, rather than reading advice about doing it. It just kind of clicks in your brain when practicing, which is why I think in this case drawing numerous sketches like Proko recommends to be very useful (and essential)!
I’m definitely excited to move on to the Robo Bean, which is the next step up in complexity from this base form in a later lesson.
Of course, I couldn’t help having a little fun by the end of this assignment illustrating random bean puns. A cookie for you if you can guess which ones they are!