The ideas have broiled, the sketches have been kneaded to perfection, and now we reach the most difficult phase of this image for me – coloration. Normally, this is the phase that’s the most fun, but this image fought with me tooth and nail to defy my whims!
Problem #1 – Being a monthly series, I have a limited palette of pre-defined colors to work with which are restricted by the main elements, the flowers and birthstones for each month. In this case, my choices for January are garnet, carnations, and snow drops.
Add on top of that I want to have a ‘stepping into sunlight’ theme with sunbeams streaming in and the challenge becomes even more tricky! Lucky for me at least that carnations come in many colors and snowdrops are a neutral white. I’m not sure how lucky I’ll be with the rest of these angels that have flowers available in one color only!
The first idea I had was to have the realm of Spring beyond the ‘doorway’ in the image, so that bright area of contrast was fighting with me as well. I did quite a few color tests in digital and watercolor, the disasters of which I’m almost embarrassed to share:
 |
| After doing these, the idea of a glowing halo around her body was dropped in favor of not going insane from dueling colors and light sources. |
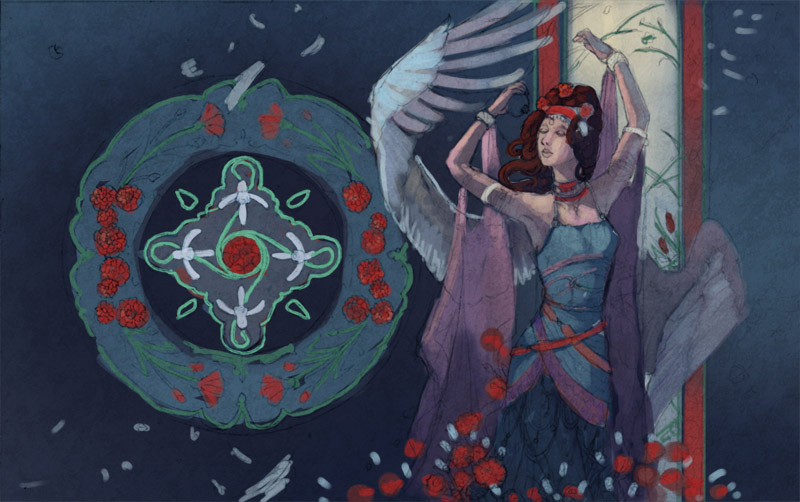 |
| While I like the simplicity and contrast of Sam’s color scheme, the window felt too dark for my tastes. |
 |
| Springboarding from Sam’s theme, I lightened it up with sunbeams and a sunrise themed ‘spring’ realm behind her. |
 |
| Outlined in Prismacolor Color Pencils. The color of the lines gives a deeper optical richness to the final piece than simply using black outlines. |
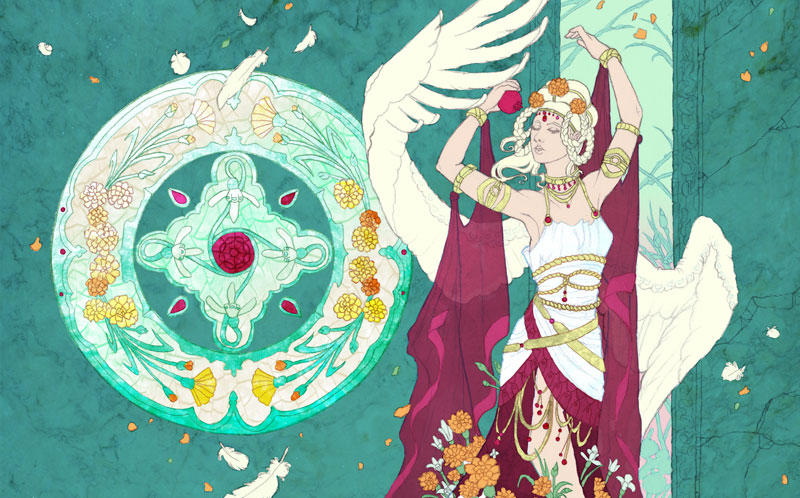 |
| Eventually, I arrived at this final complimentary color scheme with orange accents. The idea shifted to sunbeams penetrating a subterranean underworld which pushed everything green! (Thanks to Hayley‘s critique) |
It’s at this step that I’ve added textures from free texture sites and my own references to help add texture and interest to my digital shading. The color pencil outline layer sits above all of my other color layers and is set to Multiply so that all the color layers beneath it will be visible while maintaining their color value and the color tint of the outline layer.
The color layers each have texture layers above them set to Overlay so that the texture will be very subtle and show the colors beneath it. In the next entry, I’ll go more into depth about my digital color process. It’s all very experimental at the moment. Maybe a video will be more helpful here?
Sunbeams, glimmering dust motes, and jewels glittering in the dark await! I’m excited to get started shading this painting digitally. Got to keep my digitalart-fu strong!
The top right one in the quad and the bottom-most one you’ve done excite me!!
By the way, back to credit card-con-stuff…I downloaded the Square app to my smartphone for free and they sent me a card reader that plugs into your headphone jack in your phone. They take a percentage of your sales, but its not like paying a monthly fee!! I will be using it at my first con this weekend.
https://squareup.com/
It’s great to see how this is coming along! I think going digital on this one was a good choice. Love the coloured lines!