While I was uploading necklaces to my Etsy page, I took a few setup photos which I thought might prove useful to someone out there. So here goes my impromptu tutorial on photographing glass tile necklaces!
For those who are unfamiliar, glass tile necklaces are necklaces made by affixing artwork (or a reproduction of the artwork) onto glass tiles with special glass adhesive. They’re a fun way to pass the time and some of my best-selling items at conventions.
First, you will need a few things. Obviously, a camera is a given! I use a Nikon D50 which allows me to focus manually, if need be, and control the shutter speed/F stop. Any camera with decent focusing abilities should work, however, since we’ll be photographing in bright light, which is easy to focus in. (More on camera settings later!)
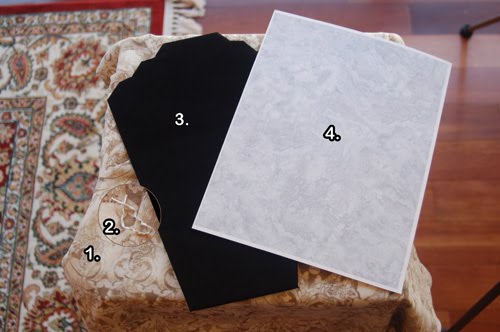
1. Tabletop with Covering – This is just a simple waist-high nightstand with a dress skirt draped over it. The skirt is a light material with vintage patterning on it which makes a perfect backdrop for my style of necklaces. I don’t recommend strong bold patterns as a backdrop since it can detract from your items.
For the purposes of this tutorial, we won’t even be seeing the vintage backdrop, but it is useful when photographing other styles of necklaces that require you to capture the necklace display and part of the background (like this).
2. Twist-tie – It’s hard to see in this image, but that’s a twist-tie. I use this to hold together the cord or chain of the necklace, should it be too long to display properly on the velvet display.
3. Necklace Display – This is a flat style necklace display that you can grab from the beading section of any store like Hobby Lobby, Michaels, etc. for just a few bucks.
4. Cardstock Backdrop – This is just a simple piece of white cardstock which you can get from any craft store that sells scrapbooking stuff. I took a stock photo of marble and edited it to a neutral low texture image then printed it onto the paper myself. This will act as our main backdrop for the art tile necklaces.
I set up my small table in our sun room, which has large open windows that let the light stream in on sunny days. If you have direct sunlight streaming in, you should put up a white muslin sheet or bedsheet to diffuse the strong light. That way your items will have soft shadows instead of harsh ones. This keeps your glass tiles from having strong reflections in them that can obscure the art underneath the glass.
 Arrangement – The items are arranged so that the light is coming in from the right side of the necklace, making the shadows stronger on the left.
I took the images for this tutorial in late afternoon when the sunlight wasn’t streaming directly in, but rather bouncing off other objects, making the light less stark without a sheet to diffuse it.
Alternatively, days with consistent, but light cloud covering work just as well.
Camera Settings – Honestly, I keep it simple and use my camera set on Automatic with the file settings on FINE JPEG, that way they are relatively small file sizes with large dimensions. You don’t really need raw or huge files for Etsy, since the site displays files fine at a minimum height/width of 450 px and a max file size of 2 MB. You can take huge pictures so customers can zoom in, but I find that if they can make out a decently focused image of the item that having huge pictures is not necessarily required.
Since the lighting is so bright, you don’t really need to tweak your advanced settings unless you want to make your white balance perfect (but this is beyond the scope of this tutorial). I do recommend the use of a tripod (which you can get at Walmart for $20) to keep your camera steady.
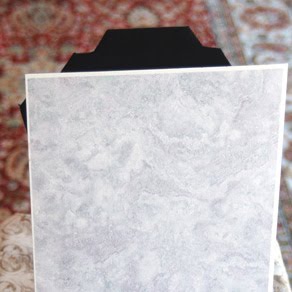 Step 1. Lay the cardstock against the necklace display. This should leave enough room for the ‘neck’ part of the display to be exposed.
 Step 2. Drape your necklace over the neck part of the display. If the necklace is too long and runs onto the tabletop, use the twist-tie to bind the cords in the back.
Step 3. Use your camera’s focus brackets to line up the lens with the very center of detail in your tile. I always take at least 3 shots of any angle on a necklace to make sure I will have plenty of variations to choose from.
Step 4. Load them up in Photoshop and tweak them to your liking. Personally, I tweak the Exposure and Gamma (Under Image>Adjustments>Exposure) of my photos till their brightness and detail matches my needs. Smart Sharpen (under Filters>Sharpen) can be handy when a photo is slightly out of focus as well.
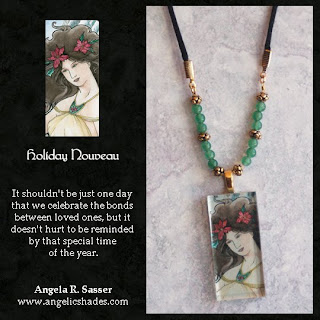
The finished product, prettified and arranged for Etsy!