Category: tutorial

SKETCH DIARY: Lady of June

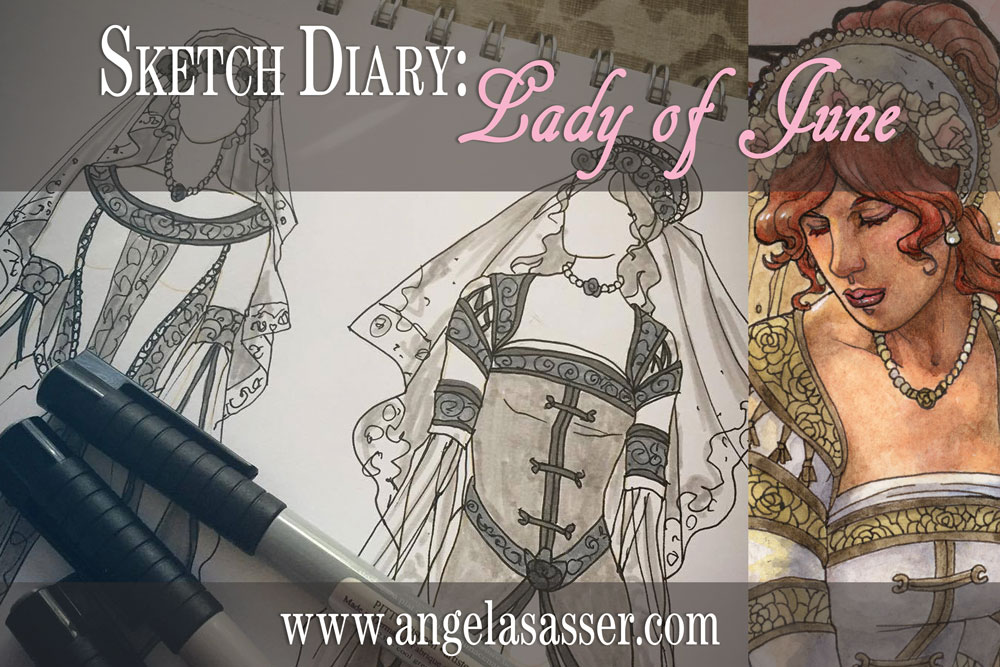
My journey continues this month with Lady of June!  Lady of November represented a milestone of high quality and attention to detail in this series that was hard to beat!  How could I make the rest of the Ladies as good as November?  That was the difficult challenge I set for myself as I moved on to this month and ventured into the first of the Ladies of summertime!

After the dark whimsy of Lady of November, we’ve returned to the Ladies of Summer!  Admittedly, this Lady has been a challenge thus far.  While November had a lot of amazing imagery to play with, June is more of a subtle time of year.  Its celebration of youthfulness and young brides reminds of May’s themes, with one of the only unique events being the Summer Solstice.  I’ve been struggling to find Lady of June’s unique visual story to make her different enough from the other Ladies, but that’s what research is all about!

MOOD BOARD

One of the most prominent themes I found while researching the Summer Solstice via Pinterest image gathering was the celebration of Litha and the Sun Wheel.  The Solstice celebrates the reigning power of the Sun.  The Sun Wheel was an old tradition where a representation of the sun was set aflame and rolled down a hill to symbolize its shifting phases.  As soon as I saw the Wheel, I knew it’d be the perfect inspiration for the mandala window!

RESEARCH NOTES

Research for the Ladies always begins with the origin of the month’s name.  In this case, June was named for Juno, the goddess of marriage and well-being of women.  She was also wife to Jupiter/Zeus.  I look across different cultures and see what about this time of year strikes a chord with humanity.  June in the northern hemisphere is a high point of Summer, a time of divination, and a powerful phase of feminine power.

Writing notes helps me to search out the imagery and symbolism I want to include in this Lady’s painting.  I think of flowers, plants, and brides.  The symbol of the well as a tool of divination also struck a chord with me, which is why it shows up so much in my thumbnail sketches.


 THUMBNAIL SKETCHES

Many of these thumbnails explore using water in a well or pond as a divination tool.  2 and 4 feel a little close to Lady of March, with 4 feeling a bit more like a representation of Vanity.  3 captures a more traditional bridal theme, while 1, 5, 6, and 7 seem to capture that theme of a bride searching for her love in the reflection for a more unified theme.  In the end, my favorites are 1, 5, and 6, with 5 and 6 having the clearest shapes and classical feel.

Character Posing

Read more

Sketch Diary – Winter Offering

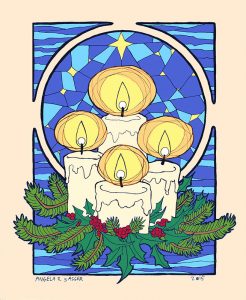
Inspiration: Every year I do a painting to spread the cheer of the winter holidays to my fans, friends, and family.  Keeping in that tradition, I created this piece entitled “Winter Offering” for 2015.

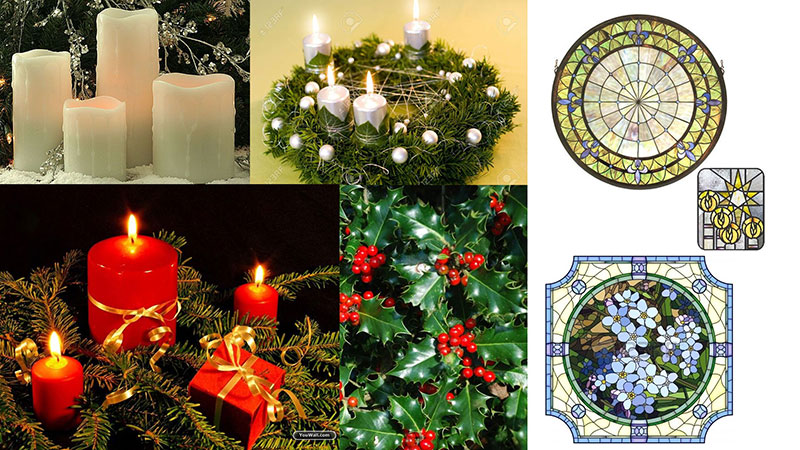
I wanted to capture the quiet warmth of candles, which are one of my favorite decorative elements of the season, and pay homage to some of the Celtic traditions that define the holidays with the presence of evergreen holly and pine.  I also wanted a celestial theme for the window to represent the dark, cold winter nights which the light guides us through.

Tools and Techniques

For this painting, I used Photoshop CC and a Wacom Cintiq 21UX.

References

ref-winter-offering

A selection from my references. 

Art Process

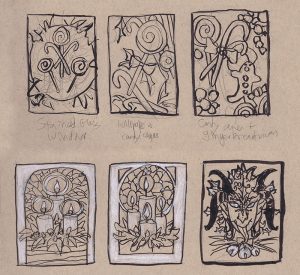
Step 1 – Thumbnail sketching with ink and white color pencil on toned paper to find the right idea. At first, I wanted to do a candy theme, but the candles struck me with their simplicity and elegance. The Krampus one was also a fun contender, but I decided to save him for another time.

wip-candles-thumbnails 

Step 2 –  Reference gathering! I looked at many Tiffany glass windows, wreaths, and white candles for inspiration.  I keep a secret reference board for my yearly holiday images on Pinterest.

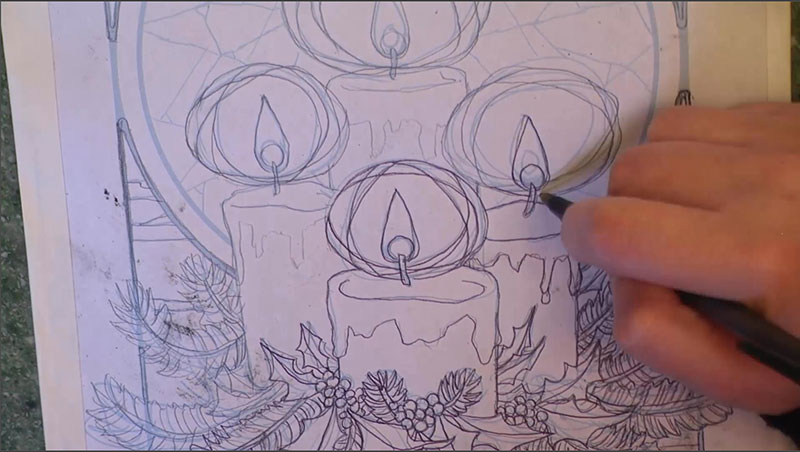
Step 3 – I did a rough sketch in Photoshop keeping loose and quick.  The sketch was then printed out and refined with pencil sketching on top of the lightly printed line work.

christmas-2015

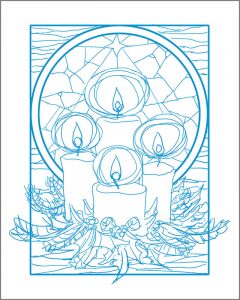
Step 4 – This refined sketch was then scanned in and the lines turned blue so they could be easily transferred.  I also used the same refined sketch to do a digital color test so I had an idea of my colors before I put paint on paper.

winter-offering-color-test

Step 5 – The refined sketch with blue line work was then printed and transferred with graphite dust applied to the back of the printout.

transfer-process

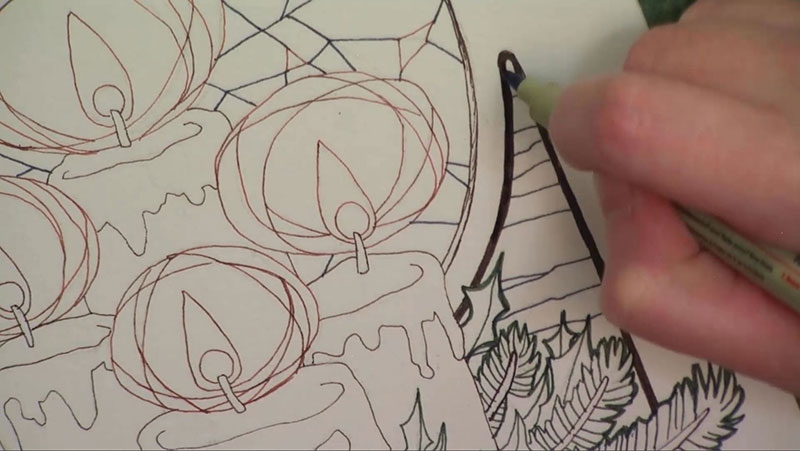
Step 6 – The transferred line work on the illustration board were inked with various colors of mechanical pens for visual contrast and interest.

colored-ink

Step 7 – The ink drawing was finished with watercolor paints.

You can also watch the 5 minute time lapse video of how I created this painting here!

For more in-depth instruction on how I created this image, including the brands of materials I used, tips on creating a stained glass style in watercolor, etc., pledge to any $10 and up level on my Patreon to gain access to the narrated video tutorial!

You can also buy the individual tutorial separately at my Gumroad shop, but you won’t receive the other extras you would by purchasing via Patreon.

TUTORIAL – Rapunzel Comic in Woodcut Style

I’ve created a tutorial video for how I made a comic strip in a digital woodcut style for my Rapunzel comic!  I walk you through how I designed the panel layouts to the finished product giving helpful tips along the way.  A .PSD file of my comic strip is also included for your perusal!

To see this video, you’ll need to pledge to me on Patreon at the $10+ level!  Alternatively, you can also buy this tutorial individually via my Gumroad shop, but you won’t get any of the extra perks that Patreon gives you (ie. wallpapers, sneak peeks, etc.).

You can watch a 4 minute preview of this video at my YouTube channel.

I did not use any special brushes for this creation. Only the default round hard brush set to Pen Pressure!  I hope you enjoy this glimpse into my process for this month’s creation. If you have any questions, don’t hesitate to ask in comments!

What I Learned from Master Copying – Offering to Venus

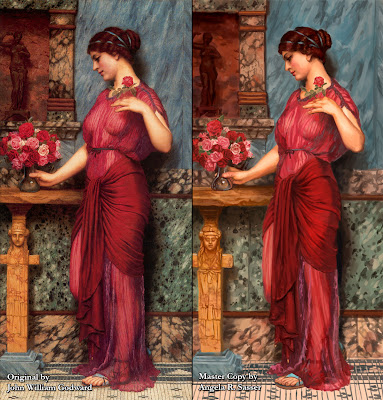
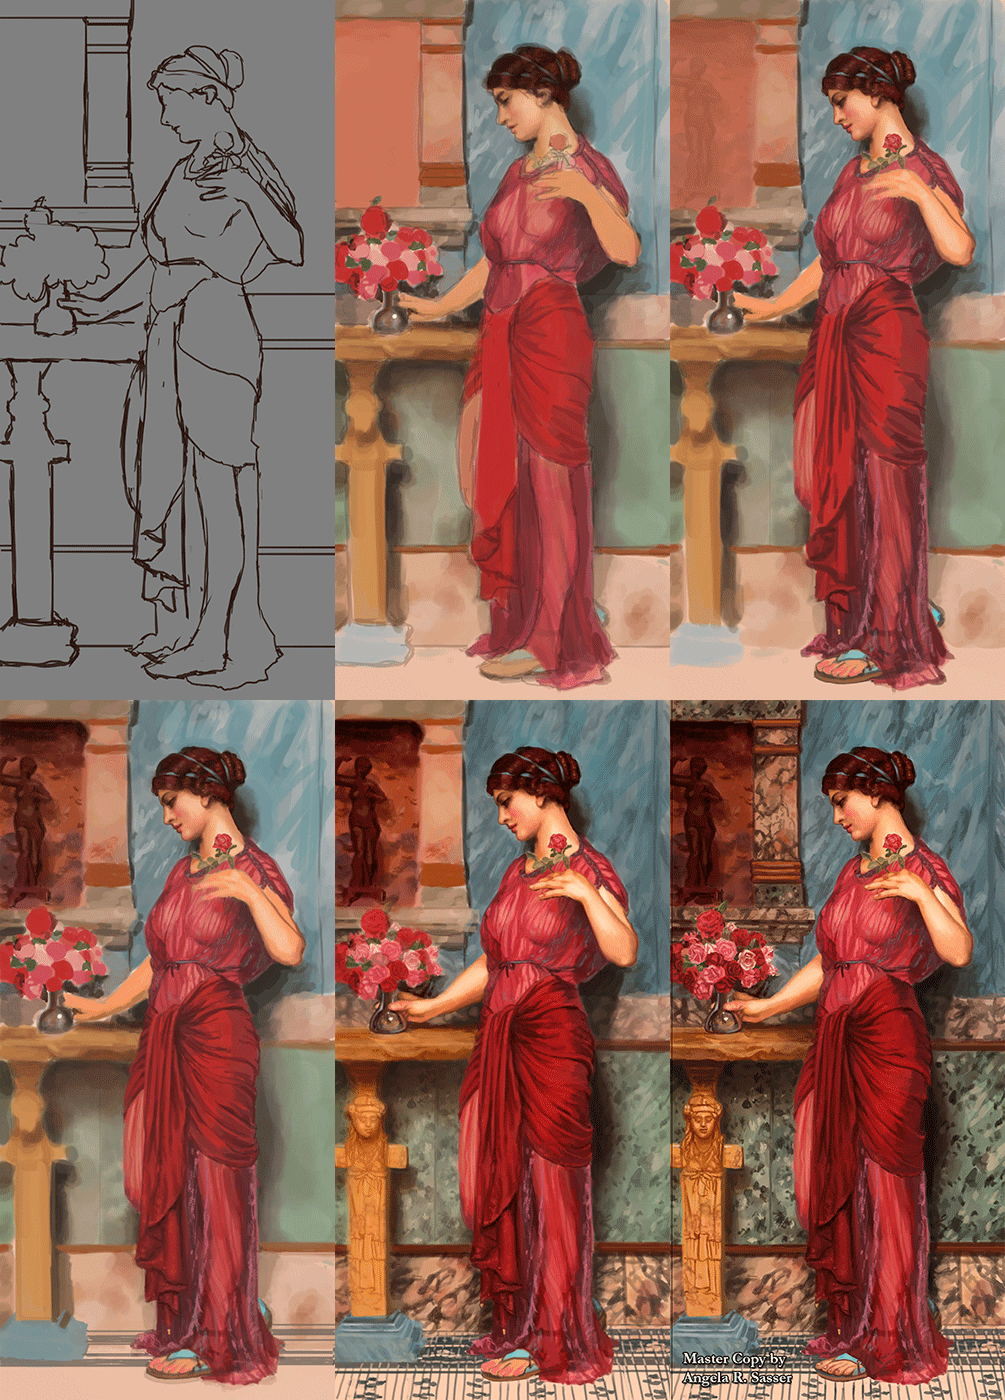
I recently finished a master copy of John William Godward’s painting, Offering to Venus.  This was my first ever attempt at copying a masterwork and it’s proven to be a most enlightening experience!  Many thanks to Sam Hogg for her suggestion to try this exercise and her tutorials on the matter.

See a step by step with detailed notes at WiPnation.

Why Do This?

Why would someone drive themselves insane this way, you ask?  For me, I did this exercise to prime myself for another painting which I had hit a dead end with.  I wanted skin glow, gorgeous roses, a classical painterly feel, and translucent material, but it all seemed flat and plastic no matter what I did with it.  I needed some time away from the piece to figure out how this was done.

The ‘other’ painting, a reinterpretation of the cover of
Kushiel’s Dart by Jacqueline Carey.

That’s when I came upon John William Godward’s Offering to Venus.  This painting had everything I wanted in my own – glowing soft skin, roses, sheer cloth, and a classical feel.

How Did I Do This?

In order to get the most out of this exercise, I followed Sam’s established rules:


1. NO tracing!
Hone my artist’s eye for proportions by using a grid.  Using this method also forced me to pay attention to the volume of objects in the image, rather than simply tracing the lines in a mechanical fashion.  I set the grid up using Guides in Photoshop.

2. NO color fills!
Paint in the gradient of the first layer with brush strokes instead. Color fills just make the image look mechanical and plastic if you paint because the gradient is too perfect.

3. NO color picker!

Learn to eyeball color instead of using the color picker to pick them from the original. This is to force me how to guess how it was mixed and be mindful of layering, as it’s important to digital as well as traditional painting.


What Did I Learn?

Copying is NOT the Point! – I could have copied each and every detail, but that wasn’t the point of this assignment and would take far longer than a practice exercise should. I went in with the mindset of expecting to learn specific skills and make specific observations.  Doing this beforehand gave me some goals to meet, other than ‘drive myself crazy with copying things down to the brushstroke’.
Know When to Find Edges – Achieving a soft, painterly feel in a piece is all a matter of losing edges.  Having solid lines throughout only flattens the image instead of giving a sense of light bouncing off surfaces.  By the same token, there are key outlines around the bottom of the nose, the toes, where cast shadows are deepest in the folds of the cloth to show where fabric overlaps and many other areas.  
Outlining in key places can really pop those soft edges, by contrast!  Losing detail also helps bring the viewer’s eye where the painter wants it as well as create a depth of field for a more immersive quality.  The roses are a perfect example of this. Notice how the roses around the edges of the grouping in the vase are barely more than blobs with a few key brushstrokes to intimate petals while the ones in the middle of the vase (closer to the viewer) are in more sharp detail.
Color Circulation – I noticed a method the artist used to tie the model to the background and make the whole image feel cohesive was to repeat colors around the image.  Her hair is the same hue as the terra cotta red of the background statue which is also repeated in various veins and coloration of the marble.  The pink and reds of the dress are repeated in the roses.  The blue of the background marble repeats again in the ribbons and sleeve seems of her dress and the bounced light of the sheer cloth as well as a spot of blue marble towards the bottom of the piece.  It’s all so perfectly balanced and you don’t really understand that till you’re looking at it up close like this.

Delicate Features – I have a bad habit of making eyes and chins of my characters very sharp and harsh.  Feminine edges are hard for me, which made her face a particular challenge!  Almost all the planes of her face are lost to soft transitions relying on highlighting and the inset of the lips and eyes to orient the viewer.  The eyelashes, for example, are softened by shadow, which gives her a much more realistic and delicate appeal than if I’d given her harsh, mascara-laden eyelashes and super defined lips as I usually do for my characters.
Do Not Fear the Darkness! – For as soft and glowing as everything seems, this painting has a deceiving level of near-black shadows in it, all of which are in the dark brown range.  I realize I almost never use near-black in my paintings and this was a great exercise to force me to do so.
Mark-Making isn’t Just for Traditional Painters – Zooming in close on the original image revealed so many value transitions that are not just smooth gradients.  The cloth of her dress, marble, and sheer robes, for example, were very hard for me to replicate because while the overall forms and texture are smooth, the highlights have a subtle dappling that give these items a vaguely textured feel.  
Directional mark-making by hatching my color transitions instead of blending them with a huge translucent brush helped to bring back that painterly feel that digital is naturally disinclined to.  It’s so easy to try to get EVERY pixel perfect when that painterliness factors in due to the mistakes and imperfections of a brush.
Skin and Light – It’s so easy to just paint in the flat colors, blend them, and call it done with digital, only to discover you’ve made a muddy plasticine mess!  This happened to me with the skin, at first, till I realized that by laying the vibrant oranges and pinks down initially, then layering base tones and white highlights on top that I could preserve that glowing luminosity that makes Godward’s works shine.  I feel I should have known this, as a watercolor artist, considering laying in the skin blush is what I usually did first.  Digital painting shares a lot more with traditional painting techniques than I had originally thought! 
All in all, this has been a great exercise for me. I hope you all will try it out for yourselves and tell me what you learn!
Finally, here is an animated gif of my copy’s progression!
And a video link for those who can’t see the GIF properly:

Top Posts of 2011

I’m stealing this idea from Hayley at Eventide because it seemed like a great way to wind down the year on this journal and to remember all that’s happened here in 2011!

I started this blog waay back in 2009, which feels like forever ago, and looking back helps me realize how this blog has grown into so many interesting pathways!

My top blog posts of this year (not including popular posts from previous years that are still some of my most highly viewed topics) aaaare:

1. Evolution of an Artist’s Alley Table Parts 1 and 2
I like to keep a record of how I display my artwork for my own purposes and so others might learn from my trial and error. These posts cover how my displays for art shows have leveled up over the years! I hope it saves ya’ll money and helps you to make your wares look their best!

2. DragonCon 2011 Con Report

The con report/review for my biggest event of the year!  I like to do a con report for every con I go to so that other artists might benefit from my working experience there.  DragonCon has always been my favorite event to go to each year and I learn something new no matter what!  There are also plenty of links to great costumes and silly videos we made in this post.
3. Ezio Mask Dev Diary (Parts 1, 2, and 3)
An in-depth walkthrough of how I created my Venetian Assassin Mask inspired by Assassin’s Creed 2.
Because everyone likes free stuff! This was my first ever book giveaway and hopefully not the last!

5. Commissions, Portfolio Reviews, and Study Sources

A comprehensive blog of study sources for traditional artists wishing to learn more digital work and those interested in game art.  Also announced my call for Portfolio Reviews in this blog (which I’m still taking on an ongoing basis!)
A glimpse at some of the many pieces I had going on for this year’s DragonCon.  Many of these pieces were sold before they were properly photographed, so this entry is the only record of them!
Another artisan craft tutorial on how to set a stone in a leather mask.
An in-depth review of my experiences with Artfire, another website much like Etsy that exists to serve the handmade market.
9. Sketch Diary: Angel of January (Parts 1, 2, 3, and 4)
An in-depth walkthrough of my piece “Angel of January” detailing the creative process, working with photo references, and learning new digital tricks.
Probably the most difficult entry for me to write, as it took admitting some of my failures of being an artist this year.  It really helped me get my thoughts in order, however, and put me in a better position to start thinking of solutions!
Now, onward to 2012!  I hope that my entries continue to provide helpful info to other creative professionals!  I write this blog not just for myself, but you, the readers, so if you know of any topics you’d like to suggest for me to cover in the coming year, please feel free to suggest them here in comments!
Till next year!

Sketch Diary: Angel of January Part 4

Continuing from the last sketch diary entry detailing the battle of wills against horrible color schemes.  I wasn’t quite sure how to compose this next entry, as I couldn’t quite figure out how to record my many hours of tweaking in Photoshop nor do I want to confuse you with the cluttered mess that is my digital coloring method.

I am relatively new to digital painting so I haven’t quite figured out the most efficient way to paint yet.  How about a list of things I learned during this painting that made me fear digital coloring less instead?

Learn the use of Layer Masks and Adjustment Layers!
Being able to tweak the contrast, color, etc. of an image without destroying the integrity of your original image will save you many headaches in the end.  Layer Masks are especially helpful if you want to integrate textures into your image with a more natural feel while Adjustment layers let you tweak elements such as Levels, Contrast, etc. while still keeping your original image untouched.  For example, I used a Gradient via a Fill Adjustment Layer to get the subtle green glow in the texture of the marble behind my angel in this painting.

(Peter Morhbacher has some great tuts on using masks and integrating texture, “How to Apply Texture Without Looking Like a Douche” and “Masking Tutorial” ).

Creating convincing light beams is totally easier in digital.
Wish I could say it was my brilliant idea that resulted in the light beams coming from the top left on my painting, but it was from this jewel of a tutorial.  I used the thicker beams they mentioned in another tut by the same person.  A gal could get used to not having to mask off with tape or masking fluid or painting around the light shafts like I would in watercolor. Hoorah for saving time!
Blending takes time…even in digital.
90% of my time on this image was spent blending and blending and BLENDING some more, especially in the area of her skin.  I used default brushes set to Pen Pressure and an Intuos3 Wacom tablet to color this image. In my experience so far, if you want your image to maintain that painterly feel, it’s better to blend with brush strokes than rely on gradients or fills. It’s far too easy for things to look sleek and plastic in digital so watch yourself! 

Another trick I used to maintain a subtle texture in this painting was to insert texture from free texture sites in layers set to Overlay and attached to the various elements of my image with Clipping Masks.

For things like the skin and hair, I used roughly three default Brushes set to varying Opacity and Scatter settings. I’m sure there’s a whole world of custom brushes to discover, but these are the ones I used, in addition to the default Chalk brush, which I used to simulate the color pencil lines when I needed to touch up my color pencil layer I had scanned in from my original drawing.

A little texture goes a long way!
Critique is priceless, no matter the medium!
As much as I’d like to say this image popped out of my head sparkling and awesome, it looked like crud during a midpoint when the angel’s skin was purple, the window was floating and overwhelming, and I was frustrated with it.  That’s when turning to more experienced digital artists really saved the day! 
Sam Hogg and Stephanie Reeves gave me wonderful advice, paint overs, and encouragement and that is just what we need when learning a new medium, so don’t be afraid to check out places like CGsociety and Conceptart.org (or your own arty friends) for critique!

I did a time lapse video of all of my progress shots. Next time, I’ll try a screen recording program (any reccomendations from you guys?)

And finally, the finished image!
“Angel of January”, 11×17 in.
Digital painting over color pencil outline.
Download a wallpaper of this image.

Angelic Shades Studio – Now Livestreaming!

After much hair pulling and teeth gnashing, I’ve finally got a channel up on Livestream! Catch live broadcasts while I paint, poke at leather, or maybe hold random live giveaways! I’ll try to remember to make a post here when I’m going live, but more often than not, I’ll be posting the announcement via my Twitter.

I did my very first broadcast today while I worked on a venetian mask! Recorded live here:

Watch live streaming video from angelicshades at livestream.com

I’ve also got all of my other tutorials, trailers, and things up at my channel so have a good poke around!

My Livestream Channel – http://www.livestream.com/angelicshades

Woo having a webcam has been fun so a far! Yay for learning new technology.:)

Color Pencil Tutorial Suggestions?

So it’s been a long while since I first uploaded my Color Pencil Tools tutorial. It’s about time I got off my duff and made some new videos! I’m doing this for all you folks out there, so what would you like to know about color pencils and working with them? Here are a few topics I’m pondering thus far:

=> Coloring Skin (including different tones of skin)
=> Smooth Blending with Colorless Blenders
=> Coloring Hair
=> Coloring Feathers
=> Mixing Media with Color Pencils

Disclaimer! These tutorials will be covering the way I personally work, meaning that I may not do things by the book or how other artists do them. It may be a little while before I can produce these videos so I wanted to start gathering thoughts now!

Tutorial – How to Make Storage Envelopes for Your Art

There have been so many little tasks on my platter lately, from website building to registration for conventions! I’ve had to shift modes to figure out just how I’ll be transporting my art safely to those art fairs and conventions that are a little farther away from home than I’ve ever ventured for an event. Watercolor paintings in Georgia/Alabama heat and humidity for hours? Lightly bubble-wrapped frames reinforced with masking tape clanking together in my back seat? Nightmare waiting to happen!

Whilst surfing through the discussions over at Art Fair Insiders, I heard mention of a product called a Gallery Pouch, which is like SUPERPOWERED bubble wrap envelopes that keep your art safe. One thing led to another and I found myself experimenting with how to Do It Yourself by making my own pouches out of things you should easily be able to find at your local hardware store.

This time, I finally hauled out the camcorder to record my efforts! Enjoy and feel free to ask questions!

Oh and should you join up over at Art Fair Insiders, tell them that AngelaRSasser sent you in the referral field!

EDIT: I should also note that I have weather tested these envelopes by leaving them in a car parked in the sun from dawn till dusk and they showed no signs of melting tape or other adverse effects. Time will tell how well they stand up to weathering usage, but I am optimistic about their survivability thus far.

Tutorial – How to Make Storage Envelopes for Your Art – Part 1

Tutorial – How to Make Storage Envelopes for Your Art – Part 2

Tutorial – Photographing Glass Tile Art Necklaces

While I was uploading necklaces to my Etsy page, I took a few setup photos which I thought might prove useful to someone out there. So here goes my impromptu tutorial on photographing glass tile necklaces!

For those who are unfamiliar, glass tile necklaces are necklaces made by affixing artwork (or a reproduction of the artwork) onto glass tiles with special glass adhesive. They’re a fun way to pass the time and some of my best-selling items at conventions.

MATERIALS


First, you will need a few things. Obviously, a camera is a given! I use a Nikon D50 which allows me to focus manually, if need be, and control the shutter speed/F stop. Any camera with decent focusing abilities should work, however, since we’ll be photographing in bright light, which is easy to focus in. (More on camera settings later!)

1. Tabletop with Covering – This is just a simple waist-high nightstand with a dress skirt draped over it. The skirt is a light material with vintage patterning on it which makes a perfect backdrop for my style of necklaces. I don’t recommend strong bold patterns as a backdrop since it can detract from your items.

For the purposes of this tutorial, we won’t even be seeing the vintage backdrop, but it is useful when photographing other styles of necklaces that require you to capture the necklace display and part of the background (like this).

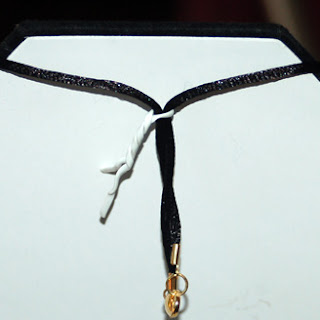
2. Twist-tie – It’s hard to see in this image, but that’s a twist-tie. I use this to hold together the cord or chain of the necklace, should it be too long to display properly on the velvet display.

3. Necklace Display – This is a flat style necklace display that you can grab from the beading section of any store like Hobby Lobby, Michaels, etc. for just a few bucks.

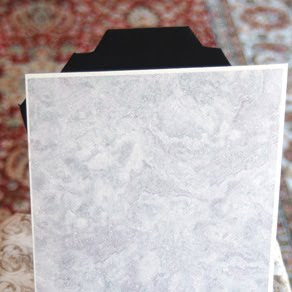
4. Cardstock Backdrop – This is just a simple piece of white cardstock which you can get from any craft store that sells scrapbooking stuff. I took a stock photo of marble and edited it to a neutral low texture image then printed it onto the paper myself. This will act as our main backdrop for the art tile necklaces.

SETUP

I set up my small table in our sun room, which has large open windows that let the light stream in on sunny days. If you have direct sunlight streaming in, you should put up a white muslin sheet or bedsheet to diffuse the strong light. That way your items will have soft shadows instead of harsh ones. This keeps your glass tiles from having strong reflections in them that can obscure the art underneath the glass.

Arrangement – The items are arranged so that the light is coming in from the right side of the necklace, making the shadows stronger on the left.

I took the images for this tutorial in late afternoon when the sunlight wasn’t streaming directly in, but rather bouncing off other objects, making the light less stark without a sheet to diffuse it.

Alternatively, days with consistent, but light cloud covering work just as well.

Camera Settings – Honestly, I keep it simple and use my camera set on Automatic with the file settings on FINE JPEG, that way they are relatively small file sizes with large dimensions. You don’t really need raw or huge files for Etsy, since the site displays files fine at a minimum height/width of 450 px and a max file size of 2 MB. You can take huge pictures so customers can zoom in, but I find that if they can make out a decently focused image of the item that having huge pictures is not necessarily required.

Since the lighting is so bright, you don’t really need to tweak your advanced settings unless you want to make your white balance perfect (but this is beyond the scope of this tutorial). I do recommend the use of a tripod (which you can get at Walmart for $20) to keep your camera steady.

Step 1. Lay the cardstock against the necklace display. This should leave enough room for the ‘neck’ part of the display to be exposed.

Step 2. Drape your necklace over the neck part of the display. If the necklace is too long and runs onto the tabletop, use the twist-tie to bind the cords in the back.

Step 3. Use your camera’s focus brackets to line up the lens with the very center of detail in your tile. I always take at least 3 shots of any angle on a necklace to make sure I will have plenty of variations to choose from.

Step 4. Load them up in Photoshop and tweak them to your liking. Personally, I tweak the Exposure and Gamma (Under Image>Adjustments>Exposure) of my photos till their brightness and detail matches my needs. Smart Sharpen (under Filters>Sharpen) can be handy when a photo is slightly out of focus as well.

PRESTO!
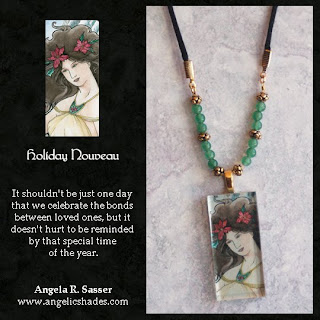
The finished product, prettified and arranged for Etsy!

See this necklace on Etsy