Category: Critique Corner

Patreon Update – Art Student Tier!

A brand new year is upon us and I’m rearing to get started on all the projects I have waiting in the wings!  With so much going on I’ve decided to pause the Mentorships I was hosting through Patreon so I don’t split my attention too much.

I know the mentorships have been helpful (and affordable) for aspiring artists, so I added a new Reward tier to take its place till I’m ready to host full mentorships again.  This new tier is called the Art Student!

With the Art Student tier, you’ll get the following:

  • Access to my usual Patreon Rewards from the prior tiers, including wallpapers, video walkthroughs, PSD files of my paintings, a PDF sketch diary, & the ability to participate in the inspiration prompt drawing each month.
  • A single paint-over OR redline per month for your work in need of critique! Additional paint-overs can be purchased separately at a discounted rate of 25% off for Art Students.
  • A narrated video of your critique will be recorded and uploaded privately for you to view at your leisure on YouTube. Critique videos will be fully detailed, providing advice and study resources.
  • A .PSD of your paintover/redline which you’re free to use as a base will also be provided!

Critiques will be delivered after the 1st of each month once the prior month’s pledges have been successfully processed. I aim to have them online within the first week of each month. You will be individually notified when your critique is available.

Questions, comments, or suggestions?  Feel free to drop me a line in the comments or via email! There’s no greater joy than unlocking the potential of a piece of art, so I’m excited to see what you all might throw at me!

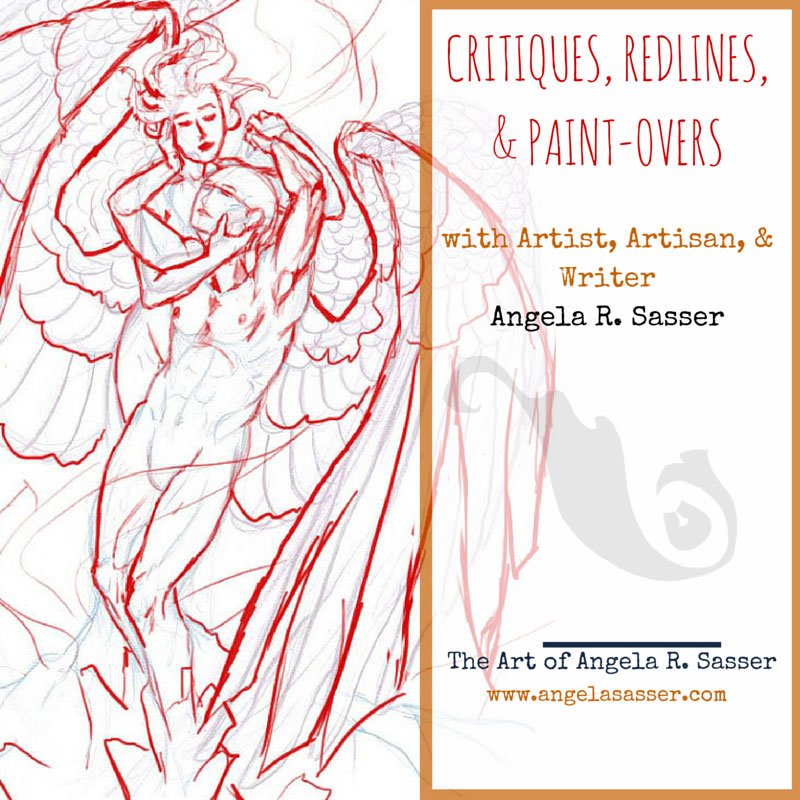
Art in the thumbnail by Jude Mayr with a redline by me.

Critiques, Portfolio Reviews, and Consultations for Artists

This week I tentatively rolled out a section on my website for Creative Consulting.

What means this ‘consulting’?  Well, some of you might remember my Portfolio Reviews and Critique Corner articles here on this blog where I was able to provide direct feedback and helpful resources to artists wishing to improve their work.

Sadly, these sections of my blog have faded away after I realized I just don’t have the time anymore to do them.  I’ve been increasingly busy dedicating myself to my own portfolio work as well as nurturing commission work on a grander scale than I ever have before.

However, I really, really hate to see these columns go and I stand behind the way this kind of direct interaction and critique can help other artists in a profound way.  As such, I am still offering portfolio reviews and critiques for modest fees, which you can view the rates here.  If you have a surplus of deviantART points, I also take payment in points for the red lines and paint overs here.

This is a way for you to work with me directly without having to catch me in-person at a convention.  We also won’t have to worry about your subject matter, which I would previously have had to censor if it was going to be featured on this blog, which I try to keep Safe for Work.

An example of a paint over and critique featuring the art of Kim Ravenfire.
You can read the full critique here.
An example of a red line featuring the art of Judith Mayr.
You can read the full critique here.

For more examples of my critiques, read on here.

I still plan to participate in critiques online in places like the GoldenCritique-Club on dA and WiPnation, but I will only be able to do so when my schedule, interest, and projects allow.

In addition to paint overs and portfolio reviews, I am also tentatively offering online art marketing consultations.  I’ve always wanted to do this, but felt I could not until I was at a point in my career where the methods I have studied and experimented with have yielded tangible results so that I can be confidant and justified when advising other artists.

E-marketing and its potential for artists is a passion of mine which I have studied professionally in the Arts Administration program at The Savannah College of Art and Design.  There, I earned my MA after the completion of my thesis focusing on the evolution of audiences and patrons via the expansion of the internet and its social venues.

I’m excited to finally be able to apply what I have learned on a grander scale! I have previously only provided advice via panels at conventions, blog posts at this journal, and private interactions with artists I know seeking advice on expanding their business.

These sessions are meant specifically for individual artists and will focus on their current e-marketing strategies, filling the gaps of their e-marketing knowledge, and discussing which online venues might work best when considering their work.

For those who are new to my work and don’t know my history in being able to critique art or speak on the topic of e-marketing for artists, you can also read about my credentials and experience with these subjects on the Creative Consulting page.

I’m excited to foster this new way of connecting and helping other artists!  I look forward to what amazing work you guys might send my way and the trust you might place in me in helping to improve your future work.

Wishing you all inspiration!

Critique Corner – Persephone by Maria

For today’s Critique Corner, we have an image by Maria Arnt.  Check out some of Maria’s other work before we get started!


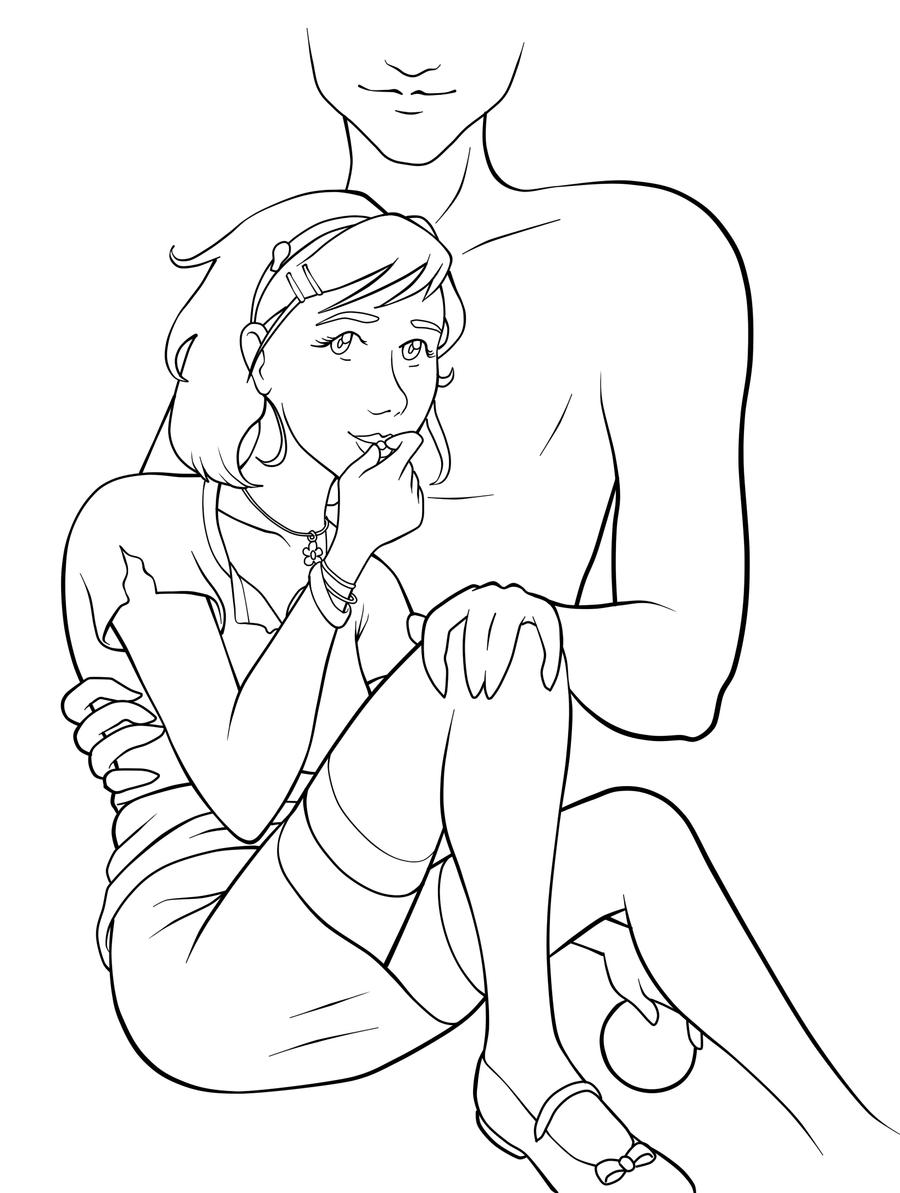
The image up for critique is “Persephone”. Maria’s main concerns were on the use of line width and anatomy, specifically the eyes.

The paintover.

On Line Width

Beautiful!  You’ve never had a problem with creating wonderfully inked pieces, from what I’ve seen of your work.  I think if you want to push the lights and darks in this image that you could add hatching or screentones for shading as well.  Otherwise, cleaner lines like this generally require color to bring a stronger mood and visual impact to a piece.

The Eyes

I think the first thing we look at in this piece would be the eyes. Persephone is glancing right at us and, being the only character with a full face, our attention is brought right to her face. Your description of the piece states the following:
“Even though she’s captured by Hades, she’s discovered she has this sort of power over him–but she’s a little afraid to use it. As she eats the pomegranate seed, her eyes are both hesitant and a little daring. Are you going to stop her? She’s not completely sure she wants you to.”
However, the wide open nature of her eyes actually makes her seem more peppy and upbeat rather than hesitant or daring.  In the paintover, I chose to divert her gaze to the pomegranate seed, which I moved further away from her lips, which suggests she’s thinking of the seed and not interacting with the viewer.  One thing to remember is that even though anime eyes are indeed wide, that doesn’t mean that they can’t be various states of open or closed, which is key in creating convincing expression, even via the abstraction of anime style.  Not rendering the eyelid as you have limits the expressiveness of the eye to looking wide, surprised, or clueless.  In addition, I’d highly recommend doing a few studies of anime expressions to get a deeper understanding of how eyes and expressions are abstracted by manga style.  The ’25 essential expression’ memes are a great way to practice!
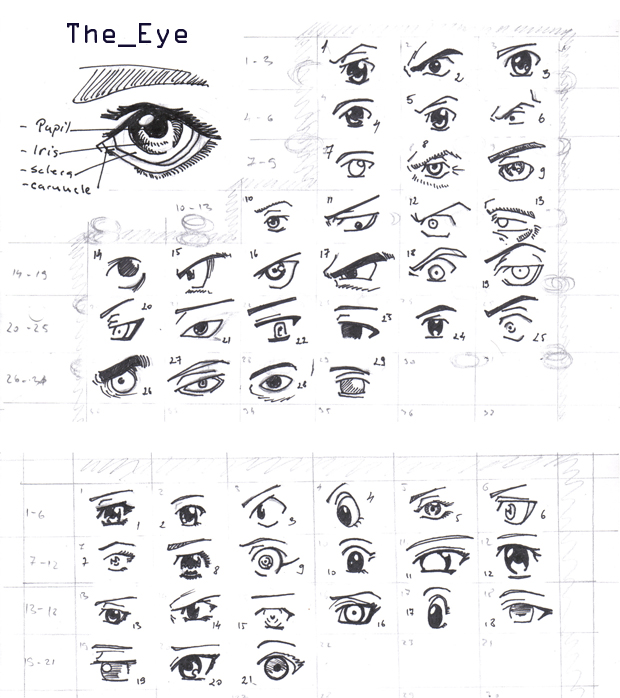
Notice how most of these manga style eyes still have eyelids (and if they don’t, the eyelid is generally implied with shading, the eyebrows compensate for the lack of expression by their angularity, or the eyes are simply drawn more slim to imply how open or closed they are):

REFERENCE-Manga eyes by ~Aoi-Ne-Blue

On Other Anatomy 

As for the rest of Persephone’s anatomy, I’ve made slight tweaks here and there. I shrank the head, as it was looking a little too large in proportion to her body.  Unless your style is SD, heads in anime usually aren’t too much larger than your standard realistic proportions, rather that the eyes are generally larger with the mouths being smaller.  I’ve also widened the wrist and slimmed her arms, as they were out of proportion to one another.  I also felt like her larger arms were detracting from her childlike presence.  Finally, I refined the anatomy of Persephone’s shoulder, as the lack of line definition and attention to the protrusion of the shoulder joints made it seem as if she had a hump in her back, due to the fact it reads as one solid muscle.

As for Hades,  he shares a similar problem as far as no definition in the joint of his shoulder and pectoral muscles, which leaves his shoulder feeling like a large solid curve, making it seem odd and disconnected.  I’ve added more definition overall to his stomach and chest and adjusted the perspective on his fingers.  Specifically, I changed the hand holding the small of her back to only show the tips of his fingers, due to the fact Persephone’s torso is showing more of a front view than a side view, meaning we wouldn’t see so much of his fingers wrapped around her because, unless his arms were very long, the points of tension where his hand is holding her would stop as they curl around her side.  Another option is to have his hand wrapped around her shoulder instead, which would be frankly an easier angle to draw and far less awkward, visually.

On Concept

All of these technical details aside, I think you could push this concept even further.  As it stands, I don’t feel like there’s much of a connection between these two, as you have implied on the description of your image (Persephone having a passive power over the infatuated Hades).  Perhaps having her glancing up at his face would help her to appear more hesitant and engage him as a force in this piece?  You could maybe even have his hand (the one grasping her leg) holding up more seeds instead, to imply even more interaction between these two.

I like the fact that you don’t see all of Hades’ face, but for a devious smile.  It gives him the presence of a looming controlling shadow, which suits your description nicely.  In the paintover, I’ve added shadowy swaths radiating from his face to help fill up the space around them and add visual interest and flow to the composition.  I’ve also added a fancy chair for Persephone to be seated on to imply their regal Underworld surroundings.  You could even push that further by having ornate plates of sweets around her that Hades might have been tempting her with.

You’ve got a great start here on a strong character piece!  I hope this critique helps you out and that you’ll be following up later with a finished version I can share with my readers.  Good luck, Maria!

DISCLAIMER: I am no ‘master artist’.  I am always learning, therefore, my word is not the end all, be all.  I encourage you to use this critique to your benefit and come up with your own solutions based on them…or not!

The Artist must serve the image, even if it disobeys the critics. Go forth and CREATE!


Want to send in an image for Critique Corner? 
Read on here to find out how!
Critique Corner – “Tiger” by Kim

For the very first post in my ‘Critique Corner’ column, we have a piece by Kim Ravenfire M.  Have a sampling of Kim’s other work, for starters:


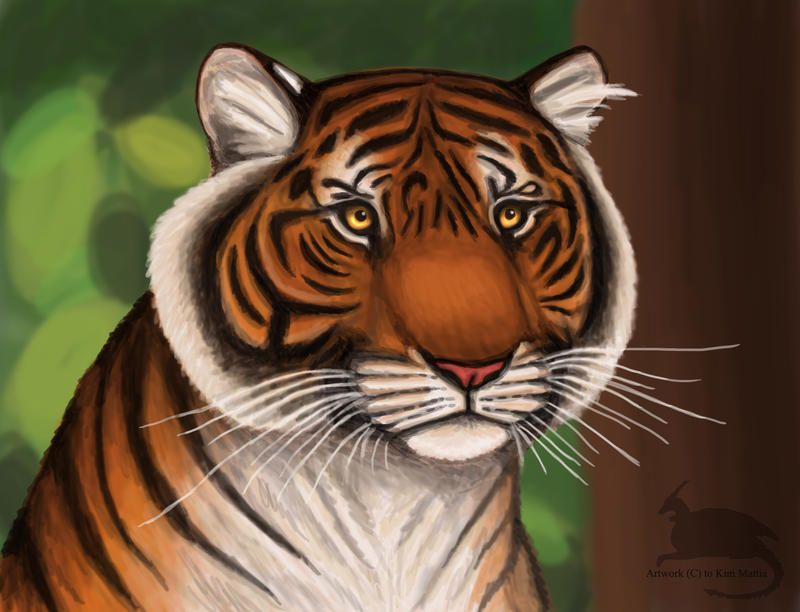
The piece up for critique today is “Tiger”:
Kim’s main concerns with this piece were basic proportions and how to make her images look more realistic in Photoshop.
The paintover:

On Colors and Textures

My first impression was that I was not surprised to hear you have background in drawing more stylized figures, Kim.  This image is very solid with bold coloration and that’s not a bad thing, persay!  Stylization can be good, but when going for a more realistic approach, keep in mind that realism is more about subtlety than showing every detail and shape.  For a furry creature, this tiger has very straight lines defining its edges (the cheeks, back, chin, etc.) and that gives the optical effect of flatness.  The solution  I went for in my paintover was to break up the fur, stripes, and edges with more brush strokes of fur texture.
As for color, realistic style calls for more subtlety in light and variation of cold and warm hues, as well.  I’ve brought a cooler tone of greenish-orange into the orange markings to bring some color variation into his coat, as well as to tie in the green of the background.  If you look closely at your tiger photo references, you’ll see that color variation they have in their coats.  It’s not a pure orange at all, but umbers, oranges, and siennas.
 
Photoshop Tips for Color Variation
A quick trick for adding subtle color variation is to paint the color you want on the highlights on a separate layer above the rest where you want variation (doesn’t matter what kind of Brush), then use the Guassian Blur filter to blur the area completely to your preference. Then, set the layer to Overlay, Lighten, or whichever Blending Mode works best (in this case, I used Screen). That usually creates a nice subtle variation without having to carefully repaint the image!
I also used a Hue/Saturation Adjustment Layer Mask to desaturate the entire piece, then masked off the center of the image so that the orange was still saturated while the rest of the image receded into a less vibrant color.  This way of creating focus by making the most detailed and brightest part of your image the focal point also helps to add realism to pieces, as Photoshop has a habit of making images naturally flat and boldly colored, if we’re not careful.  Don’t know what Adjustment Layers are? Learn them! They are super useful and save lots of time (check this tutorial for more on them).
EDIT: Another tip for color variation (which I forgot to mention during my original posting) is to start by painting on top of a pre-rendered texture.  Doing this allows for the slightest hint of textural and light complexity to shine through into your painting.
On Proportions
Looking at the nitty gritty proportions of our tiger via tiger photos shows that our subject’s nose is perhaps a little too broad, the cheeks too round, and the eyes too far apart.  I highly recommend that you do a few sketches beforehand of your creature from various angles using reference photos taken from various angles so that you can have a clearer understanding of what surfaces are involved in the bone structure. As is, the tiger’s face feels very plate-like in it’s surface shape, as if the nose, eyes, and mandible cheek fluff are all on the same surface area instead of receding into space.
The solution I used was to lessen the roundness of the cheeks while also deepening the shadows of nose.  I squared the jaw off so that it has more of it’s own distinctive shape and also moved the eyes closer together. I cheated and used the Liquify filter to push the areas into shape, but you may need to do some more layering to really make the skeletal structures and shadows convincing.  I also added cosmetic details, such as a bit of texturing and segmenting to the tiger’s nose and the very small shiny lower lip that’s usually visible on most felines.
Overall:
 
Work on breaking up your solid shapes and colors with more texture and color variation, respectively. Pay close attention to what is in focus and what is not in your compositions to bring that convincing depth of field into your work, which will really push the realism!  Finally, check out other wildlife painters.  Even if their work isn’t digital, you can still study how they translate realistic figures into the abstraction of color and how they lay out detail in their compositions.
 
“That Moment” by
Sam Hogg


Extras:
I used this wonderful brush set from Mr–Jack on DeviantART for the paintover. Maybe they’ll prove useful for you for that painterly effect!


DISCLAIMER: I am no ‘master artist’.  I am always learning, therefore, my word is not the end all, be all.  I encourage you to use this critique to your benefit and come up with your own solutions based on them…or not!

The Artist must serve the image, even if it disobeys the critics. Go forth and CREATE!


Want to send in an image for Critique Corner? 
Read on here to find out how!